Lesson 4: Practical Python for the GIS analyst
The links below provide an outline of the material for this lesson. Be sure to carefully read through the entire lesson before returning to Canvas to submit your assignments.
Lesson 4 Overview
Lesson 4 contains a variety of subjects to help you use Python more effectively as a GIS analyst. The sections of this lesson will reinforce what you've learned already, while introducing some new concepts that will help take your automation to the next level.
You'll learn now to modularize a section of code to make it usable in multiple places. You'll learn how to use new Python modules, such as os, to open and read files; then you'll transfer the information in those files into geographic datasets that can be read by ArcGIS. Finally, you'll learn how to use your operating system to automatically run Python scripts at any time of day.
Lesson 4 Checklist
Lesson 4 explores some more advanced Python concepts, including reading and parsing text. To complete Lesson 4, do the following:
- One week into the lesson, submit your Final Project proposal [1] to the instructors using the Final Project Proposal Drop Box in the Final Project lesson under the Modules tab in Canvas. For the exact due date, see the Calendar tab in Canvas.
- Work through the course lesson materials.
- Read Zandbergen chapters 12.1 - 12.6 (ArcMap edition), 4.17, and 9.1 - 9.7. In the online lesson pages, I have inserted instructions about when it is most appropriate to read each of these chapters.
- Complete Project 4 and submit your zipped deliverables to the Project 4 drop box in Canvas .
- Complete the Lesson 4 Quiz in Canvas .
Do items 1 - 3 (including any of the practice exercises you want to attempt) during the first week of the lesson. You will need time during the second week of the lesson to concentrate on the project and the quiz.
Lesson objectives
By the end of this lesson, you should:
- understand how to create and use functions and modules;
- be able to read and parse text in Python (e.g., using the csv module);
- be able to create new geometries and insert them into feature classes using insert cursors;
- understand how to automate tasks with scheduling and batch files;
- know the basics of dealing with Pro projects in arcpy;
- understand Python dictionaries;
- be able to write ArcGIS scripts that create new features and feature classes, e.g., from information in text files.
4.1 Functions and modules
One of the fundamentals of programming that we did not previously cover is functions. To start this lesson, we'll talk about functions and how you can use them to your benefit as you begin writing longer scripts.
A function contains one focused piece of functionality in a reusable section of code. The idea is that you write the function once, then use, or call, it throughout your code whenever you need to. You can put a group of related functions in a module, so you can use them in many different scripts. When used appropriately, functions eliminate code repetition and make the main body of your script shorter and more readable.
Functions exist in many programming languages, and each has its way of defining a function. In Python, you define a function using the def statement. Each line in the function that follows the def is indented. Here's a simple function that reads the radius of a circle and reports the circle's approximate area. (Remember that the area is equal to pi [3.14159...] multiplied by the square [** 2] of the radius.)
>>> def findArea(radius):
... 	area = 3.14159 * radius ** 2
... 	return area
...
>>> findArea(3)
28.27431
Notice from the above example that functions can take parameters, or arguments. When you call the above function, you supply the radius of the circle in parentheses. The function returns the area (notice the return statement, which is new to you).
Thus, to find the area of a circle with a radius of 3 inches, you could make the function call findArea(3) and get the return value 28.27431 (inches).
It's common to assign the returned value to a variable and use it later in your code. For example, you could add these lines in the Python Interpreter:
In [1]: aLargerCircle = findArea(4)
In [2]: print (aLargerCircle)
50.26544
Please click this link to take a close look [2] at what happens when the findArea(...) function is called and executed in this example using the code execution visualization feature of pythontutor.com [3]. In the browser window that opens, you will see the code in the top left. Clicking the "Forward" and "Back" buttons allows you to step through the code, while seeing what Python stores in memory at any given moment in the window in the top right.
- After clicking the "Forward" button the first time, the definition of the function is read in and a function object is created that is globally accessible under the name findArea.
- In the next step, the call of findArea(4) in line 5 is executed. This results in a new variable with the name of the function's only parameter, so radius, being created and assigned the value 4. This variable is a local variable that is only accessible from the code inside the body of the function though.
- Next, the program execution jumps to the code in the function definition starting in line 1.
- In step 5, line 2 is executed and another local variable with the name area is created and assigned the result of the computation in line 2 using the current value of the local variable radius, which is 4.
- In the next step, the return statement in line 3 sets the return value of the function to the current value of local variable area (50.2654).
- When pressing "Forward" again, the program execution jumps back to line 5 from where the function was called. Since we are now leaving the execution of the function body, all local variables of the function (radius and area) are discarded. The return value is used in place of the function call in line 5, in this case meaning that it is assigned to a new global variable called aLargerCircle now appearing in memory.
- In the final step, the value assigned to this variable (50.2654) is printed out.
It is important to understand the mechanisms of (a) jumping from the call of the function (line 5) to the code of the function definition and back, and of (b) creating local variables for the parameter(s) and all new variables defined in the function body and how they are discarded again when the end of the function body has been reached. The return value is the only piece of information that remains and is given back from the execution of the function.
A function is not required to return any value. For example, you may have a function that takes the path of a text file as a parameter, reads the first line of the file, and prints that line to the Console. Since all the printing logic is performed inside the function, there is really no return value.
Neither is a function required to take a parameter. For example, you might write a function that retrieves or calculates some static value. Try this in the Console:
In [1]: def getCurrentPresident():
...: 	return "Joseph R. Biden Jr"
...:
In [2]: president = getCurrentPresident()
In [3]: print (president)
Joseph R. Biden Jr
The function getCurrentPresident() doesn't take any user-supplied parameters. Its only "purpose in life" is to return the name of the current president. It cannot be asked to do anything else.
Modules
You may be wondering what advantage you gain by putting the above getCurrentPresident() logic in a function. Why couldn't you just define a string currentPresident and set it equal to "Joseph R. Biden Jr"? The big reason is reusability.
Suppose you maintain 20 different scripts, each of which works with the name of the current President in some way. You know that the name of the current President will eventually change. Therefore, you could put this function in what's known as a module file and reference that file inside your 20 different scripts. When the name of the President changes, you don't have to open 20 scripts and change them. Instead, you just open the module file and make the change once.
You may remember that you've already worked with some of Python's built-in modules. The Hi Ho! Cherry O example in Lesson 2 imported the random module so that the script could generate a random number for the spinner result. This spared you the effort of writing or pasting any random number generating code into your script.
You've also probably gotten used to the pattern of importing the arcpy site package at the beginning of your scripts. A site package can contain numerous modules. In the case of arcpy, these modules include Esri functions for geoprocessing.
As you use Python in your GIS work, you'll probably write functions that are useful in many types of scripts. These functions might convert a coordinate from one projection to another, or create a polygon from a list of coordinates. These functions are perfect candidates for modules. If you ever want to improve on your code, you can make the change once in your module instead of finding each script where you duplicated the code.
Creating a module
To create a module, create a new script in PyScripter and save it with the standard .py extension; but instead of writing start-to-finish scripting logic, just write some functions. Here's what a simple module file might look like. This module only contains one function, which adds a set of points to a feature class given a Python list of coordinates.
# This module is saved as practiceModule1.py

# The function below creates points from a list of coordinates
#  Example list: [[-113,23][-120,36][-116,-2]]

def createPoints(coordinateList, featureClass):

    # Import arcpy and create an insert cursor
    import arcpy

    with arcpy.da.InsertCursor(featureClass, ("SHAPE@XY")) as rowInserter:

        # Loop through each coordinate in the list and make a point
        for coordinatePair in coordinateList:
            rowInserter.insertRow([coordinatePair])
The above function createPoints could be useful in various scripts, so it's very appropriate for putting in a module. Notice that this script has to work with an insert cursor, so it requires arcpy. It's legal to import a site package or module within a module.
Also notice that arcpy is imported within the function, not at the very top of the module like you are accustomed to seeing. This is done for performance reasons. You may add more functions to this module later that do not require arcpy. You should only do the work of importing arcpy when necessary, that is, if a function is called that requires it.
The arcpy site package is only available inside the scope of this function. If other functions in your practice module were called, the arcpy module would not be available to those functions. Scope applies also to variables that you create in this function, such as rowInserter. Scope can be further limited by loops that you put in your function. The variable coordinatePair is only valid inside the for loop inside this particular function. If you tried to use it elsewhere, it would be out of scope and unavailable.
Using a module
So how could you use the above module in a script? Imagine that the module above is saved on its own as practiceModule1.py. Below is an example of a separate script that imports practiceModule1.
# This script is saved as add_my_points.py

# Import the module containing a function we want to call
import practiceModule1

# Define point list and shapefile to edit
myWorldLocations = [[-123.9,47.0],[-118.2,34.1],[-112.7,40.2],[-63.2,-38.7]]
myWorldFeatureClass = "c:\\Data\\WorldPoints.shp"

# Call the createPoints function from practiceModule1
practiceModule1.createPoints(myWorldLocations, myWorldFeatureClass)
The above script is simple and easy to read because you didn't have to include all the logic for creating the points. That is taken care of by the createPoints function in the module you imported, practiceModule1. Notice that to call a function from a module, you need to use the syntax module.function().
Readings
To reinforce the material in this section, we'd like you to read Zandbergen's chapter on Creating Python functions and classes. However, you won't find that chapter in his Python Scripting for ArcGIS Pro. When revising his original ArcMap edition of the book, he decided to write a companion Advanced Python Scripting for ArcGIS Pro and he moved this chapter to the advanced book. Assuming you didn't purchase the advanced book, we recommend accessing the content (Chapter 12) through the e-book made available through the Penn State Library [4]. Because that's the ArcMap edition, please note the following ArcMap/ArcGIS Pro differences:
- The random module discussed in section 12.2 will be in a different location than listed in the text. On my machine, it is found at C:\Program Files\ArcGIS\Pro\bin\Python\envs\arcgispro-py3\Lib.
- Section 12.3 discusses a path configuration file called Desktop10.1.pth. The analogous file in Pro is ArcGISPro.pth, found on my machine at C:\Program Files\ArcGIS\Pro\bin\Python\envs\arcgispro-py3\Lib\site-packages.
Practice
Before moving ahead, get some practice in PyScripter by trying to write the following functions. These functions are not graded, but the experience of writing them will help you in Project 4. Use the course forums to help each other.
- A function that returns the perimeter of a square given the length of one side.
- A function that takes a path to a feature class as a parameter and returns a Python list of the fields in that feature class. Practice calling the function and printing the list. However, do not print the list within the function.
- A function that returns the Euclidean distance between any two coordinates. The coordinates can be supplied as parameters in the form (x1, y1, x2, y2). For example, if your coordinates were (312088, 60271) and (312606, 59468), your function call might look like this: findDistance(312088, 60271, 312606, 59468). Use the Pythagorean formula A ** 2 + B ** 2 = C ** 2. For an extra challenge, see if you can handle negative coordinates.
The best practice is to put your functions inside a module and see if you can successfully call them from a separate script. If you try to step through your code using the debugger, you'll notice that the debugger helpfully moves back and forth between the script and the module whenever you call a function in the module.
4.2 Python Dictionaries
In programming, we often want to store larger amounts of data that somehow belongs together inside a single variable. In Lesson 2, you already learned about lists, which provide one option to do so. As long as available memory permits, you can store as many elements in a list as you wish and the append(...) method allows you to add more elements to an existing list.
Dictionaries are another data structure that allows for storing complex information in a single variable. While lists store elements in a simple sequence and the elements are then accessed based on their index in the sequence, the elements stored in a dictionary consist of key-value pairs and one always uses the key to retrieve the corresponding values from the dictionary. It works like in a real dictionary, where you look up information (the stored value) under a particular keyword (the key).
Dictionaries can be useful to realize a mapping, for instance from English words to the corresponding words in Spanish. Here is how you can create such a dictionary for just the numbers from one to four:
In [1]: englishToSpanishDic = { "one": "uno", "two": "dos", "three": "tres", "four": "cuatro" }
The curly brackets { } delimit the dictionary, similarly to how squared brackets [ ] do for lists. Inside the dictionary, we have four key-value pairs separated by commas. The key and value for each pair are separated by a colon. The key appears on the left of the colon, while the value stored under the key appears on the right side of the colon.
We can now use the dictionary stored in variable englishToSpanishDic to look up the Spanish word for an English number, e.g.
In [2]: print (englishToSpanishDic["two"])
dos
To retrieve some value stored in the dictionary, we here use the name of the variable followed by squared brackets containing the key under which the value is stored in the dictionary. If we use the same notation but on the left side of an assignment operator (=), we can add a new key-value pair to an existing dictionary:
In [3]: englishToSpanishDic["five"] = "cinco"
In [4]: print (englishToSpanishDic)
{'four': 'cuatro', 'three': 'tres', 'five': 'cinco', 'two': 'dos', 'one': 'uno'}
We here added the value "cinco" appearing on the right side of the equal sign under the key "five" to the dictionary. If something would have already been stored under the key "five" in the dictionary, the stored value would have been overwritten. You may have noticed that the order of the elements of the dictionary in the output has changed, but that doesn’t matter since we always access the elements in a dictionary via their key. If our dictionary would contain many more word pairs, we could use it to realize a very primitive translator that would go through an English text word-by-word and replace each word by the corresponding Spanish word retrieved from the dictionary. Admittedly, using this simple approach would probably result in pretty hilarious translations.
Now let’s use Python dictionaries to do something a bit more complex. Let’s simulate the process of creating a book index that lists the page numbers on which certain keywords occur. We want to start with an empty dictionary and then go through the book page-by-page. Whenever we encounter a word that we think is important enough to be listed in the index, we add it and the page number to the dictionary.
To create an empty dictionary in a variable called bookIndex, we use the notation with the curly brackets but nothing in between:
In [5]: bookIndex = {}
In [6]: print (bookIndex)
{}
Now, let’s say the first keyword we encounter in the imaginary programming book we are going through is the word "function" on page 2. We now want to store the page number 2 (value) under the keyword "function" (key) in the dictionary. But since keywords can appear on many pages, what we want to store as values in the dictionary are not individual numbers but lists of page numbers. Therefore, what we put into our dictionary is a list with the number 2 as its only element:
In [7]: bookIndex["function"] =  [2]
In [8]: print (bookIndex)
{'function': [2]}
Next, we encounter the keyword "module" on page 3. So, we add it to the dictionary in the same way:
In [9]: bookIndex["module"] =  [3]
In [10]: print (bookIndex)
{'function': [2], 'module': [3]}
So now our dictionary contains two key-value pairs, and for each key it stores a list with just a single page number. Let’s say we next encounter the keyword “function” a second time, this time on page 5. Our code to add the additional page number to the list stored under the key “function” now needs to look a bit differently because we already have something stored for it in the dictionary, and we do not want to overwrite that information. Instead, we retrieve the currently stored list of page numbers and add the new number to it with append(…):
In [11]: pages = bookIndex["function"]
In [12]: pages.append(5)
In [13]: print (bookIndex)
{'function': [2, 5], 'module': [3]}
In [14]: print (bookIndex["function"])
[2, 5]
Please note that we didn’t have to put the list of page numbers stored in variable pages back into the dictionary after adding the new page number. Both, variable pages and the dictionary refer to the same list such that appending the number changes both. Our dictionary now contains a list of two page numbers for the key “function” and still a list with just one page number for the key “module”. Surely, you can imagine how we would build up a large dictionary for the entire book by continuing this process. Dictionaries can be used in concert with a for loop to go through the keys of the elements in the dictionary. This can be used to print out the content of an entire dictionary:
In [15]: for k in bookIndex:  # loop through keys of the dictionary
...:    print ("keyword: " + k)                # print the key
...:    print ("pages: " + str(bookIndex[k]))  # print the value
...:
keyword: function
pages: [2, 5]
keyword: module
pages: [3]
When adding the second page number for “function”, we ourselves decided that this needs to be handled differently than when adding the first page number. But how could this be realized in code? We can check whether something is already stored under a key in a dictionary using an if-statement together with the “in” operator:
In [16]: keyword = "function"
In [17]: if keyword in bookIndex:
...:    print ("entry exists")
...: else:
...:    print ("entry does not exist")
...:
entry exists
So assuming we have the current keyword stored in variable word and the corresponding page number stored in variable pageNo, the following piece of code would decide by itself how to add the new page number to the dictionary:
word = "module"
pageNo = 7

if word in bookIndex:
	# entry for word already exists, so we just add page
	pages = bookIndex[word]
	pages.append(pageNo)
else:
	# no entry for word exists, so we add new entry
	bookIndex[word] = [pageNo]
A more sophisticated version of this code would also check whether the list of page numbers retrieved in the if-block already contains the new page number to deal with the case that a keyword occurs more than once on the same page. Feel free to think about how this could be included.
Readings
Read Zandbergen section 4.17 on using Python dictionaries.
4.3 Reading and parsing text using the Python csv module
One of the best ways to increase your effectiveness as a GIS programmer is to learn how to manipulate text-based information. In Lesson 3, we talked about how to read data in ArcGIS's native formats, such as feature classes. But often GIS data is collected and shared in more "raw" formats such as a spreadsheet in CSV (comma-separated value) format, a list of coordinates in a text file, or an XML [5] response received through a Web service.
When faced with these files, you should first understand if your GIS software already comes with a tool or script that can read or convert the data to a format it can use. If no tool or script exists, you'll need to do some programmatic work to read the file and separate out the pieces of text that you really need. This is called parsing the text.
For example, a Web service may return you many lines of XML describing all the readings at a weather station, when all you're really interested in are the coordinates of the weather station and the annual average temperature. Parsing the response involves writing some code to read through the lines and tags in the XML and isolating only those three values.
There are several different approaches to parsing. Usually, the wisest is to see if some Python module exists that will examine the text for you and turn it into an object that you can then work with. In this lesson, you will work with the Python "csv" module that can read comma-delimited values and turn them into a Python list. Other helpful libraries such as this include lxml and xml.dom for parsing XML, and BeautifulSoup for parsing HTML.
If a module or library doesn't exist that fits your parsing needs, then you'll have to extract the information from the text yourself using Python's string manipulation methods. One of the most helpful ones is string.split(), which turns a big string into a list of smaller strings based on some delimiting character, such as a space or comma. For instance, the following example shows how to split a string in variable text at each occurence of a comma and produce a list of strings of the different parts:
>>> text = "green,red,blue"
>>> text.split(",")
['green', 'red', 'blue']
When you write your own parser, however, it's hard to anticipate all the exceptional cases you might run across. For example, sometimes a comma-separated value file might have substrings that naturally contain commas, such as dates or addresses. In these cases, splitting the string using a simple comma as the delimiter is not sufficient, and you need to add extra logic.
Another pitfall when parsing is the use of "magic numbers" to slice off a particular number of characters in a string, to refer to a specific column number in a spreadsheet, and so on. If the structure of the data changes, or if the script is applied to data with a slightly different structure, the code could be rendered inoperable and would require some precision surgery to fix. People who read your code and see a number other than 0 (to begin a series) or 1 (to increment a counter) will often be left wondering how the number was derived and what it refers to. In programming, numbers other than 0 or 1 are magic numbers that should typically be avoided, or at least accompanied by a comment explaining what the number refers to.
There are an infinite number of parsing scenarios that you can encounter. This lesson will attempt to teach you the general approach by walking through just one module and example. In your final project for this course, you may choose to explore parsing other types of files.
The Python csv module
A common text-based data interchange format is the comma-separated value (CSV) file. This is often used when transferring spreadsheets or other tabular data. Each line in the file represents a row of the dataset, and the columns in the data are separated by commas. The file often begins with a header line containing all the field names.
Spreadsheet programs like Microsoft Excel can understand the CSV structure and display all the values in a row-column grid. A CSV file may look a little messier when you open it in a text editor, but it can be helpful to always continue thinking of it as a grid structure. If you had a Python list of rows and a Python list of column values for each row, you could use looping logic to pull out any value you needed. This is exactly what the Python csv module gives you.
It's easiest to learn about the csv module by looking at a real example. The scenario below shows how the csv module can be used to parse information out of a GPS track file.
Introducing the GPS track parsing example
This example reads a text file collected from a GPS unit. The lines in the file represent readings taken from the GPS unit as the user traveled along a path. In this section of the lesson, you'll learn one way to parse out the coordinates from each reading. The next section of the lesson uses a variation of this example to show how you could write the user's track to a polyline feature class.
The file for this example is called gps_track.txt, and it looks something like the text string shown below. (Please note, line breaks have been added to the file shown below to ensure that the text fits within the page margins. Click on this link to the gps track.txt file [6] to see what the text file actually looks like.)
type,ident,lat,long,y_proj,x_proj,new_seg,display,color,altitude,depth,temp,time,model,filename,ltime
TRACK,ACTIVE LOG,40.78966141,-77.85948515,4627251.76270444,1779451.21349775,True,False,
    255,358.228393554688,0,0,2008/06/11-14:08:30,eTrex Venture, ,2008/06/11 09:08:30
TRACK,ACTIVE LOG,40.78963995,-77.85954952,4627248.40489401,1779446.18060893,False,False,
    255,358.228393554688,0,0,2008/06/11-14:09:43,eTrex Venture, ,2008/06/11 09:09:43
TRACK,ACTIVE LOG,40.78961849,-77.85957098,4627245.69008772,1779444.78476531,False,False,
    255,357.747802734375,0,0,2008/06/11-14:09:44,eTrex Venture, ,2008/06/11 09:09:44
TRACK,ACTIVE LOG,40.78953266,-77.85965681,4627234.83213242,1779439.20202706,False,False,
    255,353.421875,0,0,2008/06/11-14:10:18,eTrex Venture, ,2008/06/11 09:10:18
TRACK,ACTIVE LOG,40.78957558,-77.85972118,4627238.65402635,1779432.89982442,False,False,
    255,356.786376953125,0,0,2008/06/11-14:11:57,eTrex Venture, ,2008/06/11 09:11:57
TRACK,ACTIVE LOG,40.78968287,-77.85976410,4627249.97592111,1779427.14663093,False,False,
    255,354.383178710938,0,0,2008/06/11-14:12:18,eTrex Venture, ,2008/06/11 09:12:18
TRACK,ACTIVE LOG,40.78979015,-77.85961390,4627264.19055204,1779437.76243578,False,False,
    255,351.499145507813,0,0,2008/06/11-14:12:50,eTrex Venture, ,2008/06/11 09:12:50
etc. ...
Notice that the file starts with a header line, explaining the meaning of the values contained in the readings from the GPS unit. Each subsequent line contains one reading. The goal for this example is to create a Python list containing the X,Y coordinates from each reading. Specifically, the script should be able to read the above file and print a text string like the one shown below.
[['-77.85948515', '40.78966141'], ['-77.85954952', '40.78963995'], ['-77.85957098', '40.78961849'], etc.]
Approach for parsing the GPS track
Before you start parsing a file, it's helpful to outline what you're going to do and break up the task into manageable chunks. Here's some pseudocode for the approach we'll take in this example:
- Open the file.
- Read the header line.
- Loop through the header line to find the index positions of the "lat" and "long" values.
- Read the rest of the lines one by one.
- Find the values in the list that correspond to the lat and long coordinates and write them to a new list.
Importing the module
When you work with the csv module, you need to explicitly import it at the top of your script, just like you do with arcpy.
import csv
You don't have to install anything special to get the csv module; it just comes with the base Python installation.
Opening the file and creating the CSV reader
The first thing the script needs to do is open the file. Python contains a built-in open() [7] method for doing this. The parameters for this method are the path to the file and the mode in which you want to open the file (read, write, etc.). In this example, "r" stands for read-only mode. If you wanted to write items to the file, you would use "w" as the mode. The open() method is commonly used within a "with" statement, like cursors were instantiated in the previous lesson, for much the same reason: it simplifies "cleanup." In the case of opening a file, using "with" is done so that the file is closed automatically when execution of the "with" block is completed. A close() method does exist, but need not be called explicitly.
with open("C:\\data\\Geog485\\gps_track.txt", "r") as gpsTrack:
Notice that your file does not need to have the extension .csv in order to be read by the CSV module. It can be suffixed .txt as long as the text in the file conforms to the CSV pattern where commas separate the columns and carriage returns separate the rows. Once the file is open, you create a CSV reader object, in this manner:
csvReader = csv.reader(gpsTrack)
This object is kind of like a cursor. You can use the next() method to go to the next line, but you can also use it with a for loop to iterate through all the lines of the file. Note that this and the following lines concerned with parsing the CSV file must be indented to be considered part of the "with" block.
Reading the header line
The header line of a CSV file is different from the other lines. It gets you the information about all the field names. Therefore, you will examine this line a little differently than the other lines. First, you advance the CSV reader to the header line by using the next() method, like this:
header = next(csvReader)
This gives you back a Python list of each item in the header. Remember that the header was a pretty long string beginning with: "type,ident,lat,long...". The CSV reader breaks the header up into a list of parts that can be referenced by an index number. The default delimiter, or separating character, for these parts is the comma. Therefore, header[0] would have the value "type", header[1] would have the value "ident", and so on.
We are most interested in pulling latitude and longitude values out of this file, therefore we're going to have to take note of the position of the "lat" and "long" columns in this file. Using the logic above, you would use header[2] to get "lat" and header[3] to get "long". However, what if you got some other file where these field names were all in a different order? You could not be sure that the column with index 2 represented "lat" and so on.
A safer way to parse is to use the list.index() method and ask the list to give you the index position corresponding to a particular field name, like this:
latIndex = header.index("lat")
lonIndex = header.index("long")
In our case, latIndex would have a value of 2 and lonIndex would have a value of 3, but our code is now flexible enough to handle those columns in other positions.
Processing the rest of the lines in the file
The rest of the file can be read using a loop. In this case, you treat the csvReader as an iterable list of the remaining lines in the file. Each run of the loop takes a row and breaks it into a Python list of values. If we get the value with index 2 (represented by the variable latIndex), then we have the latitude. If we get the value with index 3 (represented by the variable lonIndex), then we get the longitude. Once we get these values, we can add them to a list we made, called coordList:
# Make an empty list
coordList = []

# Loop through the lines in the file and get each coordinate
for row in csvReader:
    lat = row[latIndex]
    lon = row[lonIndex]
    coordList.append([lat,lon])

# Print the coordinate list
print (coordList)
Note a few important things about the above code:
- coordList actually contains a bunch of small lists within a big list. Each small list is a coordinate pair representing the x (longitude) and y (latitude) location of one GPS reading.
- The list.append() method is used to add items to coordList. Notice again that you can append a list itself (representing the coordinate pair) using this method.
Full code for the example
Here's the full code for the example. Feel free to download the text file [6] and try it out on your computer.
# This script reads a GPS track in CSV format and
#  prints a list of coordinate pairs
import csv

# Open the input file
with open("C:\\Users\\jed124\\Documents\\geog485\\Lesson4\\gps_track.txt", "r") as gpsTrack:
    #Set up CSV reader and process the header
    csvReader = csv.reader(gpsTrack)
    header = next(csvReader)
    latIndex = header.index("lat")
    lonIndex = header.index("long")

    # Make an empty list
    coordList = []

    # Loop through the lines in the file and get each coordinate
    for row in csvReader:
        lat = row[latIndex]
        lon = row[lonIndex]
        coordList.append([lat,lon])

    # Print the coordinate list
    print (coordList)
Applications of this script
You might be asking at this point, "What good does this list of coordinates do for me?" Admittedly, the data is still very "raw." It cannot be read directly in this state by a GIS. However, having the coordinates in a Python list makes them easy to get into other formats that can be visualized. For example, these coordinates could be written to points in a feature class, or vertices in a polyline or polygon feature class. The list of points could also be sent to a Web service for reverse geocoding, or finding the address associated with each point. The points could also be plotted on top of a Web map using programming tools like the ArcGIS JavaScript API. Or, if you were feeling really ambitious, you might use Python to write a new file in KML format, which could be viewed in 3D in Google Earth.
Summary
Parsing any piece of text requires you to be familiar with file opening and reading methods, the structure of the text you're going to parse, the available parsing modules that fit your text structure, and string manipulation methods. In the preceding example, we parsed a simple text file, extracting coordinates collected by a handheld GPS unit. We used the csv module to break up each GPS reading and find the latitude and longitude values. In the next section of the lesson, you'll learn how you could do more with this information by writing the coordinates to a polyline dataset.
As you use Python in your GIS work, you could encounter a variety of parsing tasks. As you approach these, don't be afraid to seek help from Internet examples, code reference topics such as the ones linked to in this lesson, and your textbook.
4.4 Writing geometries
As you parse out geographic information from "raw" sources such as text files, you may want to convert it to a format that is native to your GIS. This section of the lesson discusses how to write vector geometries to ArcGIS feature classes. We'll read through the same GPS-produced text file from the previous section, but this time we'll add the extra step of writing each coordinate to a polyline shapefile.
You've already had some experience writing point geometries when we learned about insert cursors. To review, if you put the X and Y coordinates in a tuple or list, you can plug it in the tuple given to insertRow() for the geometry field referred to using the "SHAPE@XY" token (see page 4.1).
# Create coordinate tuple
inPoint = (-121.34, 47.1)
...

# Create new row
cursor.insertRow((inPoint))
At ArcGIS Desktop v10.6/ArcGIS Pro v2.1, Esri made it possible to create polylines and polygons by putting together a list or tuple of coordinate pairs (vertices) like the one above in sequence. When you pass that list or tuple to the insertRow() method, arcpy will "connect the dots" to create a polyline or a polygon (depending on the geometry type of the feature class you opened the insert cursor on). Multi-part and multi-ring geometries are a bit more complicated than that, but that's the basic idea for single-part geometries.
The code below creates an empty list and adds three points using the list.append() method. Then that list is plugged into an insertRow() statement, where it will result in the creation of a Polyline object.
# Make a new empty list coords = [] # Make some points point1 = (-121.34,47.1) point2 = (-121.29,47.32) point3 = (-121.31,47.02) # Put the points in the list coords.append(point1) coords.append(point2) coords.append(point3) # Open an insert cursor on the FC, add a new feature from the coords listwith arcpy.da.InsertCursor(polylineFC, ("SHAPE@")) as cursor:cursor.insertRow((coords))
In addition to the requirement that the geometry be single-part, you should also note that this list-of-coordinate-pairs approach to geometry creation requires that the spatial reference of your coordinate data matches the spatial reference of the feature class. If the coordinates are in a different spatial reference, you can still create the geometry, but you'll need to use the alternate approach covered at the bottom of this page.
Of course, you usually won't create points manually in your code like this with hard-coded coordinates. It's more likely that you'll parse out the coordinates from a file or capture them from some external source, such as a series of mouse clicks on the screen.
Creating a polyline from a GPS track
Here's how you could parse out coordinates from a GPS-created text file like the one in the previous section of the lesson. This code reads all the points captured by the GPS and adds them to one long polyline. The polyline is then written to an empty, pre-existing polyline shapefile with a geographic coordinate system named tracklines.shp. If you didn't have a shapefile already on disk, you could use the Create Feature Class tool to create one with your script.
# This script reads a GPS track in CSV format and
#  writes geometries from the list of coordinate pairs
import csv
import arcpy

polylineFC = r"C:\PSU\geog485\L4\trackLines.shp"

# Open the input file
with open(r"C:\PSU\geog485\L4\gps_track.txt", "r") as gpsTrack:
    # Set up CSV reader and process the header
    csvReader = csv.reader(gpsTrack)
    header = next(csvReader)
    latIndex = header.index("lat")
    lonIndex = header.index("long")

    # Create an empty list
    vertices = []

    # Loop through the lines in the file and get each coordinate
    for row in csvReader:
        lat = float(row[latIndex])
        lon = float(row[lonIndex])

        # Put the coords into a tuple and add it to the list
        vertex = (lon,lat)
        vertices.append(vertex)

    # Write the coordinate list to the feature class as a polyline feature
    with arcpy.da.InsertCursor(polylineFC, ('SHAPE@')) as cursor:
        cursor.insertRow((vertices,))
The above script starts out the same as the one in the previous section of the lesson. First, it parses the header line of the file to determine the position of the latitude and longitude coordinates in each reading. After that, a loop is initiated that reads each line and creates a tuple containing the longitude and latitude values. At the end of the loop, the tuple is added to the list.
Once all the lines have been read, the loop exits and an insert cursor is created using "SHAPE@" as the only element in the tuple of affected fields. Then the insertRow() method is called, passing it the list of coordinate tuples within a tuple. It's very important to note that this statement is cursor.insertRow((vertices,)), not cursor.insertRow(vertices,). Just as the fields supplied when opening the cursor must be in the form of a tuple, even if it's only one field, the values in the insertRow() statement must be a tuple.
Remember that the cursor places a lock on your dataset, so this script doesn't create the cursor until absolutely necessary (in other words, after the loop). Finally, note that the tuple plugged into the insertRow() statement includes a trailing comma. This odd syntax is needed only in the case where the tuple contains just a single item. For tuples containing two or more items, the trailing comma is not needed. Alternatively, the coordinate list could be supplied as a list within a list ([vertices]) rather than within a tuple, in which case a trailing comma is also not needed.
Extending the example for multiple polylines
Just for fun, suppose your GPS allows you to mark the start and stop of different tracks. How would you handle this in the code? You can download this modified text file with multiple tracks [8] if you want to try out the following example.
Notice that in the GPS text file, there is an entry new_seg:
type,ident,lat,long,y_proj,x_proj,new_seg,display,color,altitude,depth,temp,time,model,filename,ltime
new_seg is a boolean property that determines whether the reading begins a new track. If new_seg = true, you need to write the existing polyline to the shapefile and start creating a new one. Take a close look at this code example and notice how it differs from the previous one in order to handle multiple polylines:
# This script reads a GPS track in CSV format and
#  writes geometries from the list of coordinate pairs
#  Handles multiple polylines

# Function to add a polyline
def addPolyline(cursor, coords):
    cursor.insertRow((coords,))
    del coords[:] # clear list for next segment

# Main script body
import csv
import arcpy

polylineFC = "C:\\data\\Geog485\\tracklines.shp"

# Open the input file
with open(r"C:\PSU\geog485\L4\gps_track_multiple.txt", "r") as gpsTrack:
    # Set up CSV reader and process the header
    csvReader = csv.reader(gpsTrack)
    header = next(csvReader)
    latIndex = header.index("lat")
    lonIndex = header.index("long")
    newIndex = header.index("new_seg")

    # Write the coordinates to the feature class as a polyline feature
    with arcpy.da.InsertCursor(polylineFC, ("SHAPE@")) as cursor:
        # Create an empty vertex list
        vertices = []

        # Loop through the lines in the file and get each coordinate
        for row in csvReader:
            isNew = row[newIndex].upper()
            # If about to start a new line, add the completed line to the
            #  feature class
            if isNew == "TRUE":
                if len(vertices) > 0:
                    addPolyline(cursor, vertices)
            # Get the lat/lon values of the current GPS reading
            lat = float(row[latIndex])
            lon = float(row[lonIndex])

            # Add coordinate pair tuple to vertex list
            vertices.append((lon, lat))

        # Add the final polyline to the shapefile
        addPolyline(cursor, vertices)
The first thing you should notice is that this script uses a function. The addPolyline() function adds a polyline to a feature class, given two parameters: (1) an existing insert cursor, and (2) a list of coordinate pairs. This function cuts down on repeated code and makes the script more readable.
Here's a look at the addPolyline function:
# Function to add a polyline
def addPolyline(cursor, coords):
    cursor.insertRow((coords,))
    del coords[:]
The addPolyline function is referred to twice in the script: once within the loop, which we would expect, and once at the end to make sure the final polyline is added to the shapefile. This is where writing a function cuts down on repeated code.
As you read each line of the text file, how do you determine whether it begins a new track? First of all, notice that we've added one more value to look for in this script:
newIndex = header.index("new_seg")
The variable newIndex shows us which position in the line is held by the boolean new_seg property that tells us whether a new polyline is beginning. If you have sharp eyes, you'll notice we check for this later in the code:
  isNew = row[newIndex].upper()

  # If about to start a new line, add the completed line to the
  #  feature class
  if isNew == "TRUE":
In the above code, the upper() method converts the string into all upper-case, so we don't have to worry about whether the line says "true," "True," or "TRUE." But there's another situation we have to handle: What about the first line of the file? This line should read "true," but we can't add the existing polyline to the file at that time because there isn't one yet. Notice that a second check is performed to make sure there are more than zero points in the list before attempting to add a new polyline:
  if len(vertices) > 0:
      addPolyline(cursor, vertices)
Only if there's at least one point in the list does the addPolyline() function get called, passing in the cursor and the list.
Alternate method for creating Polylines and Polygons
Prior to ArcGIS Desktop v10.6/ArcGIS Pro v2.1, the list-of-coordinate-pairs approach to creating geometries described above was not available. The only way to create Polylines and Polygons was to create an arcpy Point object from each set of coordinates and add that Point to an Array object. Then a Polyline or Polygon object could be constructed from the Array.
The code below creates an empty array and adds three points using the Array.add() method. Then the array is used to create a Polyline object.
# Make a new empty array
array = arcpy.Array()

# Make some points
point1 = arcpy.Point(-121.34,47.1)
point2 = arcpy.Point(-121.29,47.32)
point3 = arcpy.Point(-121.31,47.02)

# Put the points in the array
array.add(point1)
array.add(point2)
array.add(point3)

# Make a polyline out of the now-complete array
polyline = arcpy.Polyline(array, spatialRef)
The first parameter you pass in when creating a polyline is the array containing the points for the polyline. The second parameter is the spatial reference of the coordinates. Recall that we didn't have any spatial reference objects in our earlier list-of-coordinate-pairs examples. That's because you can only use that method when the spatial reference of the coordinates is the same as the feature class. But when creating a Polyline (or Polygon) object from an Array, you have the option of specifying the spatial reference of the coordinates. If that spatial reference doesn't match that of the feature class, then arcpy will re-project the geometry into the feature class spatial reference. If the two spatial references are the same, then no re-projection is needed. It can't hurt to include the spatial reference, so it's not a bad idea to get in the habit of including it if you find yourself creating geometries with this alternate syntax.
Here is a version of the GPS track script that uses the Array-of-Points approach:
# This script reads a GPS track in CSV format and
#  writes geometries from the list of coordinate pairs
#  Handles multiple polylines

# Function to add a polyline
def addPolyline(cursor, array, sr):
    polyline = arcpy.Polyline(array, sr)
    cursor.insertRow((polyline,))
    array.removeAll()

# Main script body
import csv
import arcpy

polylineFC = "C:\\data\\Geog485\\tracklines_sept25.shp"
spatialRef = arcpy.Describe(polylineFC).spatialReference

# Open the input file
with open("C:\\data\\Geog485\\gps_track_multiple.txt", "r") as gpsTrack:
    # Set up CSV reader and process the header
    csvReader = csv.reader(gpsTrack)
    header = next(csvReader)
    latIndex = header.index("lat")
    lonIndex = header.index("long")
    newIndex = header.index("new_seg")

    # Write the array to the feature class as a polyline feature
    with arcpy.da.InsertCursor(polylineFC, ("SHAPE@")) as cursor:

        # Create an empty array object
        vertexArray = arcpy.Array()

        # Loop through the lines in the file and get each coordinate
        for row in csvReader:

            isNew = row[newIndex].upper()

            # If about to start a new line, add the completed line to the
            #  feature class
            if isNew == "TRUE":
                if vertexArray.count > 0:
                    addPolyline(cursor, vertexArray, spatialRef)

            # Get the lat/lon values of the current GPS reading
            lat = float(row[latIndex])
            lon = float(row[lonIndex])

            # Make a point from the coordinate and add it to the array
            vertex = arcpy.Point(lon,lat)
            vertexArray.add(vertex)

        # Add the final polyline to the shapefile
        addPolyline(cursor, vertexArray, spatialRef)
Summary
The ArcGIS Pro documentation [9]does a nice job of summarizing the benefits and limitations of creating geometries from lists of coordinates:
Geometry can also be created from a list of coordinates. This approach can provide performance gains, as it avoids the overhead of creating geometry objects. However, it is limited to only features that are singlepart, and in the case of polygons, without interior rings. All coordinates should be in the units of the feature class's spatial reference.
If you need to create a multi-part feature (such as the state of Hawaii containing multiple islands), or a polygon with a "hole" in it, then you'll need to work with Point and Array objects as described in the Alternate method section of this page. You would also use this method if your coordinates are in a different spatial reference than the feature class.
Readings
Read the Writing geometries [10] page in the ArcGIS Pro documentation, and pay particular attention to the multipart polygon example if you deal with these sorts of geometries in your work.
Read Zandbergen 9.1 - 9.7, which contains a good summary of how to read and write Esri geometries using the Points-in-an-Array method.
4.5 Automation with batch files and scheduled tasks
In this course, we've talked about the benefits of automating your work through Python scripts. It's nice to be able to run several geoprocessing tools in a row without manually traversing the Esri toolboxes, but what's so automatic about launching PyScripter, opening your script, and clicking the Run button? In this section of the lesson, we'll take automation one step further by discussing how you can make your scripts run automatically.
Scripts and your operating system
Most of the time we've run scripts in this course, it's been through PyScripter. Your operating system (Windows) can run scripts directly. Maybe you've tried to double-click a .py file to run a script. As long as Windows understands that .py files represent a Python script and that it should use the Python interpreter to run the script, the script will launch immediately.
When you try to launch a script automatically by double-clicking it, it's possible you'll get a message saying Windows doesn't know which program to use to open your file. If this happens to you, use the Browse button on the error dialog box to browse to the Python executable, most likely located in C:\Program Files\ArcGIS\Pro\bin\Python\envs\arcgispro-py3\python.exe. Make sure "Always use the selected program to open this kind of file" is checked, and click OK. Windows now understands that .py files should be run using Python.
Double-clicking a .py file gives your operating system the simple command to run that Python script. You can alternatively tell your operating system to run a script using the Windows command line interface. This environment just gives you a blank window with a blinking cursor and allows you to type the path to a script or program, followed by a list of parameters. It's a clean, minimalist way to run a script. In Windows 10, you can open the command line by clicking Start > Windows System > Command Prompt or by searching for Command Prompt in the Search box.
The command line
Advanced use of the command line is outside the scope of this course. For now, it's sufficient to say that you can run a script from the command line by typing the path of the Python executable, followed by the full path to the script, like this:
"C:\Program Files\ArcGIS\Pro\bin\Python\envs\arcgispro-py3\python.exe" C:\PSU\Geog485\Lesson1\Project1.py
Note that:
- The path to the Python executable is enclosed in quotes, since the space in Program Files would otherwise cause the command to be misinterpreted. You would need quotes around other paths in the command if they likewise contained spaces (which was not the case here).
- While text wrapping will probably cause this command to be spread across two lines in your browser, it is important that your commands have all the components -- Python path, script path, and parameters -- on the same line. If you copy/paste the example above, you should see those command components all on the same line.
If the script takes parameters, you must also type each argument separated by a space. Remember that arguments are the values you supply for the script's parameters. Here's an example of a command that runs a script with two arguments, both strings that represent pathnames. Notice that you should use the regular \ in your paths when providing arguments from the command line (not / or \\ as you would use in PyScripter).
"C:\Program Files\ArcGIS\Pro\bin\Python\envs\arcgispro-py3\python.exe" C:\PSU\Geog485\Lesson2\Project2.py C:\PSU\Geog485\Lesson2\ C:\PSU\Geog485\Lesson2\CityBoundaries.shp
If the script executes successfully, you often won't see anything except a new command prompt (remember, this is minimalist!). If your script is designed to print a message, you should see the message. If your script is designed to modify files or data, you can check those files or data (perhaps using the Catalog pane in Pro) to make sure the script ran correctly.
You'll also see messages if your script fails. Sometimes these are the same messages you would see in the PyScripter Python Interpreter Console. At other times, the messages are more helpful than what you would see in PyScripter, making the command line another useful tool for debugging. Unfortunately, at some times the messages are less helpful.
Batch files
Why is the command line so important in a discussion about automation? After all, it still takes work to open the command line and type the commands. The beautiful thing about commands is that they, too, can be scripted. You can list multiple commands in a simple text-based file, called a batch file. Running the batch file runs all the commands in it.
Here's an example of a simple batch file that runs the two scripts above. To make this batch file, you could put the text below inside an empty Notepad file and save it with a .bat extension. Remember that this is not Python; it's command syntax:
@ECHO OFF
REM Runs both my project scripts

"C:\Program Files\ArcGIS\Pro\bin\Python\envs\arcgispro-py3\python.exe" C:\PSU\Geog485\Lesson1\Project1.py
ECHO Ran project 1
"C:\Program Files\ArcGIS\Pro\bin\Python\envs\arcgispro-py3\python.exe" C:\PSU\Geog485\Lesson2\Project2.py C:\PSU\Geog485\Lesson2\ C:\PSU\Geog485\Lesson2\CityBoundaries.shp
ECHO Ran project 2
PAUSE
Here are some notes about the above batch file, starting from the top:
- @ECHO OFF prevents all the lines in your batch file from being printed to the command line window, or console, when you run the file. It's standard procedure to use this as the first line of your batch file, unless you really want to see which line of the file is executing (perhaps for debugging purposes).
- REM is how you put a comment in your batch file, the same way # denotes a comment in Python.
- You put commands in your batch file using the same syntax you used from the command line.
- ECHO prints something to the console. This can be useful for debugging, especially when you've used @ECHO OFF because you don't want to see every line of your batch file printed to the console.
- PAUSE gives a "Press any key to continue..." prompt. If you don't put this at the end of your batch file, the console will immediately close after the file is done executing. When you're writing and debugging the batch file, it's useful to put PAUSE at the end so you can see any error messages that were printed when running the file. Once your batch file is tested and working correctly, you may decide to remove the PAUSE.
Batch files can contain variables, loops, comments, and conditional logic, all of which are beyond the scope of this lesson. However, if you'll be writing and running many scripts for your organization, it's worthwhile to spend some time learning more about batch files. Fortunately, batch files have been around for a long time (they are older than Windows itself), so there's an abundance of good information available on the Internet to help you.
Scheduling tasks
At this point, we've come pretty close to reaching true automation, but there's still that need to launch the Python script or the batch file, either by double-clicking it, invoking it from the command line, or otherwise telling the operating system to run it. To truly automate the running of scripts and batch files, you can use an operating system utility such as Windows Task Scheduler.
Task Scheduler is one of those items hidden in Windows Administrative Tools that you may not have paid any attention to before. It's a relatively simple program that allows you to schedule your scripts and batch files to run on a regular basis. This is helpful if the task needs to run often enough that it would be burdensome to launch the batch file manually, but it's even more helpful if the task takes some of your computing resources, and you want to run it during the night or weekend to minimize impact on others who may be using the computer.
Here's a real-world scenario where Task Scheduler (or a comparable utility if you're running on a Mac, Linux, or UNIX) is very important: Fast Web maps tend to use a server-side cache of pregenerated map images, or tiles, so that the server doesn't have to draw the map each time someone navigates to an area. A Web map administrator who has ArcGIS Server can run the tool Manage Map Server Cache Tiles to make the tiles before he or she deploys the Web map. After deployment, the server quickly sends the appropriate tiles to people as they navigate the Web map. So far, so good.
As the source GIS data for the map changes, however, the cache tiles become out of date. They are just images and do not know how to update themselves automatically. The cache needs to be updated periodically, but cache tile creation is a time consuming and CPU-intensive operation. For this reason, many server administrators use Task Scheduler to update the cache. This usually involves writing a script or batch file that runs Manage Map Server Cache Tiles and other caching tools, then scheduling that script to run on nights or weekends when it would be least disruptive to users of the Web map.
Inside Windows Task Scheduler
Let's take a quick look inside Windows Task Scheduler. The instructions below are for Windows Vista (and probably Windows 7). Other versions of Windows have a very similar Task Scheduler, and with some adaptation, you can also use the instructions below to understand how to schedule a task.
- Open Task Scheduler by navigating the Windows Start menu to Windows Administrative Tools > Task Scheduler.
- In the Actions pane on the right side of the window, click Create Basic Task. This walks you through a simple wizard to set up the task. You can configure advanced options on the task later.
- Give your task a Name that will be easily remembered and optionally, a Description. Then click Next.
- Choose how often you want the task to run. For this example, choose Daily. Then click Next.
- Choose a Start time and a recurrence frequency. If you want, choose a time a few minutes ahead of the current time, so you can see what it looks like when a task runs. Then click Next.
- Choose Start a program, then click Next.
- Here's the moment of truth, where you specify which script or batch file you want to run. Click Browse and navigate to one of the Python scripts you've written during this course. It's going to be easiest here if you pick a script that doesn't take any arguments, such as your project 1 script that makes contour lines from hard-coded datasets, but if you are feeling brave, you can also add arguments in this panel of the wizard. Then click Next.
- Review the information about your task, then click Finish.
- Notice that your task now appears in the list in Task Scheduler. You can highlight the task to see its properties, or right-click the task and click Properties to actually set those properties. You can use the advanced properties to get your script to run even more frequently than daily, for example, every 15 minutes.
- Wait for your scheduled time to occur, or if you don't want to wait, right-click the task and click Run. Either way, you'll see a console window appear when the script begins and disappear once the script has finished. (If you're running a Python script, and you don't want the console window to disappear at the end, you can put a line at the end of the script such as lastline = input(">"). This stops the script until the user presses Enter. Once you're comfortable with the script running on a regular basis, you'll probably want to remove this line to keep open console windows from cluttering your screen. After all, the idea of a scheduled task is that it happens in the background without bothering you.)
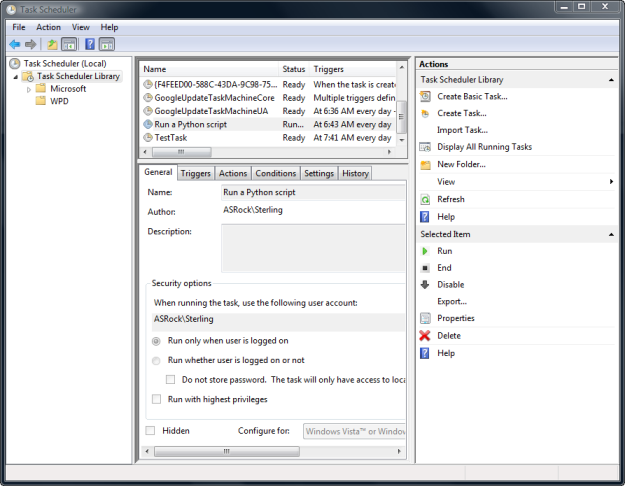 Figure 4.1 The Windows Task Scheduler.
Summary
To make your scripts run automatically, you use Windows Task Scheduler to create a task that the operating system runs at regular intervals. The task can point at either a .py file (for a single script), or a .bat file (for multiple scripts). Using scheduled tasks, you can achieve full automation of your GIS processes.
4.6 Running any tool in the box
Sooner or later, you're going to have to include a geoprocessing tool in your script that you have never run before. It's possible that you've never even heard of the tool or run it from its GUI, let alone a script.
In other cases, you may know the tool very well, but your Python may be rusty, or you may not be sure how to construct all the necessary parameters.
The approach for both of these situations is the same. Here are some suggested steps for running any tool in the ArcGIS toolboxes using Python:
- Find the tool reference documentation. We've seen this already during the course. Each tool has its own topic in the ArcGIS Pro tool reference [11] section of the Help. Open that topic and read it before you do anything else. Read the "Usage" section at the beginning to make sure that it's the right tool for you and that you are about to employ it correctly.
- Examine the parameters. Scroll down to the "Syntax" section of the topic and read which parameters the tool accepts. Note which parameters are required and which are optional, and decide which parameters your script is going to supply.
-
In your Python script, create variables for each parameter. Note that each parameter in the "Syntax" section of the topic has a data type listed. If the data type for a certain parameter is listed as "String," you need to create a Python string variable for that parameter.
Sometimes the translation from data type to Python variable is not direct. For example, sometimes the tool reference will say that the required variable is a "Feature Class." What this really means for your Python script is that you need to create a string variable containing the path to a feature class.
Another example is if the tool reference says that the required data type is a "Long." What this means in Python is that you need to create a numerical variable (as opposed to a string) for that particular parameter.
If you have doubts about how to create your variable to match the required data type, scroll down to the "Code Sample" in the tool reference topic, paying particular attention to the stand-alone script example. Try to find the place where the example script defines the variable you're having trouble with. Copy the patterns that you see in the example script, and usually, you'll be okay.
Most of the commonly used tools have excellent example scripts, but others are hit or miss. If your tool of interest doesn't have a good example script, you may be able to find something on the Esri forums or a well-phrased Google search.
- Run the tool...with error handling. You can run your script without try/except blocks to catch any basic errors in the Python Interpreter. If you're still not getting anything helpful, a next resort is to add the try/except blocks and put print arcpy.GetMessages()in the except block.
In Project 4, you'll get a chance to practice these skills to run a tool you previously haven't worked with in a script.
4.7 Working with Pro projects
To this point, we've talked about automating geoprocessing tools, updating GIS data, and reading text files. However, we've not covered anything about working with a Pro project file. There are many tasks that can be performed on a project file that are well-suited for automation. These include:
- finding and replacing text in a layout or series of layouts; for example, a copyright notice for 2018 becomes 2019;
- repairing layers that are referencing data sources using the wrong paths; for example, your map was sitting on a computer where all the data was in C:\data, and now it is on a computer where all the data is in D:\myfolder\mydata.
- printing a series of maps or data frames;
- exporting a series of maps to PDF and joining them to create a "map book";
- making a series of maps available to others on ArcGIS Server.
Pro projects are binary files, meaning they can't be easily read and parsed using the techniques we covered earlier in this lesson. Prior to the release of ArcGIS Desktop 10.0, the only way to automate anything with a map document (Desktop's analog to the Pro project) was to use ArcObjects, which was challenging for beginners and required using a language other than Python. ArcGIS Desktop 10.0 introduced a mapping module for automating common tasks with map documents. The development of ArcGIS Pro led to a very similar module, though enough differences resulted such that a new mp module was created.
The arcpy.mp module
arcpy.mp is a module you can use in your scripts to work with Pro projects. Please take a detour at this point to read the Esri Introduction to arcpy.mp [12].
The most important object in this module is ArcGISProject. This tells your script which Pro project you'll be working with. You can obtain an ArcGISProject object by referencing a path, like this:
project = arcpy.mp.ArcGISProject(r"C:\data\Alabama\UtilityNetwork.aprx")
Notice the use of r in the line above to denote a string literal. In other words, if you include r right before you begin your string, it's safe to use reserved characters like the single backslash \. I've done it here because you'll see it in a lot of the Esri examples with arcpy.mp.
Instead of directly using a string path, you could alternatively put a variable holding the path. This would be useful if you were iterating through all the project files in a folder using a loop, or if you previously obtained the path in your script using something like arcpy.GetParameterAsText().
It can be convenient to work with arcpy.mp in the Python window in Pro. In this case, you do not have to put the path to the project. There's a special keyword "CURRENT" that you can use to get a reference to the currently-open project.
project = arcpy.mp.ArcGISProject("CURRENT")
Once you get a project, then you do something with it. Let's look at this example script, which updates the year in a layout text element, then exports the layout to a PDF, and scrutinize what is going on. I've added comments to each line.
# Create an ArcGISProject object referencing the project you want to update
project = arcpy.mp.ArcGISProject(r"C:\GIS\TownCenter_2015.aprx")

# Get layout
lyt = project.listLayouts()[0] # only 1 layout in project

# Loop through each text element in the layout
for textElement lyt.listElements("TEXT_ELEMENT"):

    # Check if the text element contains the out of date text
    if textElement.text == "GIS Services Division 2018":

	# If out of date text is found, replace it with the new text
        textElement.text = "GIS Services Division 2019"

# Export the updated layout to a PDF
lyt.ExportToPDF(r"C:\GIS\TownCenterUpdate_2016.pdf")

# Clean up the MapDocument object by deleting it
del mxd
The first line in the above example gets an ArcGISProject project object referencing C:\GIS\TownCenter_2015.aprx. The example then uses the ArcGISProject object's listLayouts() method to retrieve a Python list of the layouts saved in the project. This project happens to have just one layout. Getting a reference to that layout still requires using listLayouts(), but using [0] to get the first (and only) object from the list. The Layout object in turn has a listElements() method that can be used to retrieve a list of its elements. Notice that the script asks for a specific type of element, "TEXT_ELEMENT". (Examine the documentation for the Layout class [13] to understand the other types of elements you can get back using the listElements() method.)
The method returns a Python list of TextElement [14] objects representing all the text elements in the map document. You know what to do if you want to manipulate every item in a Python list. In this case, the example uses a for loop to check the TextElement.text property of each element. This property is readable and writeable, meaning if you want to set some new text, you can do so by simply using the equals sign assignment operator as in textElement.text = "GIS Services Division 2019"
The ExportToPDF method is very simple in this script. It takes the path of the desired output PDF as its only parameter. If you look again at the Layout class's page in the documentation, you'll see that the ExportToPDF() method has a lot of other optional parameters, such as whether to embed fonts, that are just left as defaults in this example.
Learning arcpy.mp
The best way to learn arcpy.mp is to try to use it. Because of its simple, "one-line-fix" nature, it's a good place to practice your Python. It's also a good way to get used to the Python window in Pro because you can immediately see the results of your actions.
Although there is no arcpy.mp component to this lesson's project, you're welcome to use it in your final project. If you've already submitted your final project proposal, you can amend it to use arcpy.mp by emailing and obtaining approval from the instructor/grading assistant. If you use arcpy.mp in your final project, you should attempt to incorporate several of the functions or mix it with other Python functionality you've learned, making something more complex than the "one line fix" type of script I mentioned above.
By now, you'll probably have experienced the reality that your code does not always run as expected on the first try. Before you start running arcpy.mp commands on your production projects, I suggest making backup copies.
Here are a few additional places where you can find excellent help on learning arcpy.mp:
- The ArcMap version of Zandbergen's text (free e-book linked earlier in the lesson), Chapter 10. The mapping module has changed a fair bit from ArcMap to Pro, but I recommend that you skim this chapter to see the types of tasks that the module can address.
- The Mapping module book [12] in the ArcGIS Pro Help
- Intro to Map Automation [15] technical workshop from the 2019 Esri User Conference
4.8 Limitations of Python scripting with ArcGIS
In this course, you've learned the basics of programming and have seen how Python can automate any GIS function that can be performed with the ArcGIS toolboxes. There's a lot of power available to you through scripting, and hopefully, you're starting to get ideas about how you can apply that in your work outside this course.
To conclude this lesson, however, it's important to talk about what's not available through Python scripting in ArcGIS.
Limits with fine-grained access to the "guts" of ArcGIS
Python interaction with ArcGIS is mainly limited to reading and writing data, editing the properties of project files, and running the tools that are included with ArcGIS. Although the ArcGIS tools are useful, they are somewhat black box, meaning you put things in and get things out without knowing or being concerned about what is happening inside. In ArcGIS Desktop, the ArcObjects SDK could be used to gain access to "the building blocks" of the software, providing a greater degree of control over the tools being developed. And a product called ArcGIS Engine made it possible to develop stand-alone applications that provide narrowly tailored functionality. Working with ArcObjects/ArcGIS Engine required coding in a non-Python language, such as Visual Basic .NET or C# .NET.
In the transition to ArcGIS Pro, the same access to the fine-grained building blocks does not (yet?) exist. However, developers can extend/customize the Pro user interface using the Pro SDK [16] and can develop stand-alone apps using the ArcGIS Runtime SDKs [17]. As with the Desktop ArcObjects and ArcGIS Engine products, the Pro SDK and Runtime SDKs require coding with a language other than Python.
Limits with user interface customization
In this course, we have done nothing with customizing Pro to add special buttons, toolbars, and so on that trigger our programs. Our foray into user interface design has been limited to making a script tool and toolbox. Although script tools are useful, there are times when you want to take the functionality out of the toolbox and put it directly into Pro as a button on a toolbar. You may want that button to launch a new window with text boxes, labels, and buttons that you design yourself.
This is one place that capabilities have taken a step backward (so far?) in the development of Pro. In ArcGIS Desktop (starting at 10.1), Python developers could create such UI customizations relatively easily by developing what Esri called "Python add-ins." Unfortunately, such easy-to-develop add-ins for Pro cannot be developed with Python. Development of custom Pro interfaces can be done with Python GUI toolkits, a topic covered in our Advanced Python class (GEOG 489). Such customization can also be accomplished with the Pro SDK. Both of these pathways are recommended for folks who've done very well in this class and/or already have strong programming experience.
If you still utilize ArcGIS Desktop at work and are interested in the idea of developing "easy" Python add-ins, you should check out the ArcGIS Desktop Python add-ins [18] topic in the Desktop Help system. (And rest assured that Python scripting for Desktop is very similar to the scripting you've done in this course for Pro.)
Lesson 4 Practice Exercises
These practice exercises will give you some more experience applying the Lesson 4 concepts. They are designed to prepare you for some of the techniques you'll need to use in your Project 4 script.
Download the data for the practice exercises [19]
Both exercises involve opening a file and parsing text. In Practice Exercise A, you'll read some coordinate points and make a polygon from those points. In Practice Exercise B, you'll work with dictionaries to manage information that you parse from the text file.
Example solutions are provided for both practice exercises. You'll get the most value out of the exercises if you make your best attempt to complete them on your own before looking at the solutions. In any case, the patterns shown in the solution code can help you approach Project 4.
Lesson 4 Practice Exercise A
This practice exercise is designed to give you some experience writing geometries to a shapefile. You have been provided two things:
- A text file MysteryStatePoints.txt containing the coordinates of a state boundary.
- An empty polygon shapefile that uses a geographic coordinate system.
The objective
Your job is to write a script that reads the text file and creates a state boundary polygon out of the coordinates. When you successfully complete this exercise, you should be able to preview the shapefile in Pro and see the state boundary.
Tips
If you're up for the challenge of this script, go ahead and start coding. But if you're not sure how to get started, here are some tips:
- In this script, there is no header line to read. You are allowed to use the values of 0 and 1 directly in your code to refer to the longitude and latitude, respectively. This should actually make the file easier to process.
- Before you start looping through the coordinates, create an empty list (or Array object) to hold all the (x,y) tuples (or Point objects) of your polygon.
- Loop through the coordinates and create a (x,y) tuple (or Point object) from each coordinate pair. Then add the tuple (or Point object) to your list (or Array object).
- Once you're done looping, create an insert cursor on your shapefile. Go to the first row and assign your list (or Array) to the SHAPE field.
Lesson 4 Practice Exercise A Solution
Here's one way you could approach Lesson 4 Practice Exercise A with comments to explain what is going on. If you find a more efficient way to code a solution, please share it through the discussion forums.
# Reads coordinates from a text file and writes a polygon

import arcpy
import csv

arcpy.env.workspace = r"C:\PSU\geog485\L4\Lesson4PracticeExerciseA"

shapefile = "MysteryState.shp"
pointFilePath = arcpy.env.workspace + r"\MysteryStatePoints.txt"

# Open the file and read the first (and only) line
with open(pointFilePath, "r") as pointFile:
    csvReader = csv.reader(pointFile)

    # This list will hold a clockwise "ring" of coordinate pairs
    #Â  that will form a polygon
    ptList = []

    # Loop through each coordinate pair
    for coords in csvReader:
        # Append coords to list as a tuple
        ptList.append((float(coords[0]),float(coords[1])))

    # Create an insert cursor and apply the Polygon to a new row
    with arcpy.da.InsertCursor(shapefile, ("SHAPE@")) as cursor:
        cursor.insertRow((ptList,))
Alternatively, an arcpy Array containing a sequence of Point objects could be passed to the insertRow() method rather than a list of coordinate pairs. Here is how that approach might look:
# Reads coordinates from a text file and writes a polygon

import arcpy
import csv

arcpy.env.workspace = r"C:\PSU\geog485\L4\Lesson4PracticeExerciseA"

shapefile = "MysteryState.shp"
pointFilePath = arcpy.env.workspace + r"\MysteryStatePoints.txt"
spatialRef = arcpy.Describe(shapefile).spatialReference

# Open the file
with open(pointFilePath, "r") as pointFile:
    csvReader = csv.reader(pointFile)

    # This Array object will hold a clockwise "ring" of Point
    #  objects, thereby making a polygon.
    polygonArray = arcpy.Array()

    # Loop through each coordinate pair and make a Point object
    for coords in csvReader:

        # Create a point, assigning the X and Y values from your list
        currentPoint = arcpy.Point(float(coords[0]),float(coords[1]))

        # Add the newly-created Point to your Array
        polygonArray.add(currentPoint)

    # Create a Polygon from your Array
    polygon = arcpy.Polygon(polygonArray, spatialRef)

    # Create an insert cursor and apply the Polygon to a new row
    with arcpy.da.InsertCursor(shapefile, ("SHAPE@")) as cursor:
        cursor.insertRow((polygon,))
Below is a video offering some line-by-line commentary on the structure of these solutions. Note that the scripts shown in the video don't use the float() function as shown in the solutions above. It's likely you can run the script successfully without float(), but we've found that on some systems the coordinates are incorrectly treated as strings unless explicitly cast as floats.
Video: Solution to Lesson 4 Practice Exercise A (11:02)
This video walks through the solution to Lesson 4, practice exercise A where you have a text file with some coordinates that looks like this. And you need to loop through them, parse them out, and then create a polygon out of it to create the shape of a US state.
This is a very basic list of coordinates. There's no header here. So, we're just going to blast right through this as if it were a csv file with two columns and no header.
In order to do this, we're going to use arcpy, which we import in line 3, and the csv module for Python, which we import in line 4. In lines 8 and 9, we set up some variables referencing the files that we're going to work with. So, we're working with the mystery state shapefile that was provided for you.
This shapefile is in the WGS84 geographic coordinate system. However, there is no shape or polygon within this shapefile yet. You will add that. And then, line 9 references the path to the text file containing all the coordinate points.
In line 12, we open up that text file that has the points. The first parameter in the open method is pointFilePath, which we created in line 9. And then the second parameter is r in quotes. And that means we're opening it in read mode. We're just going to read this file. We're not going to write anything into it.
And in line 13, we then pass that file into the reader() method so that we can create this csvReader object that will allow us to iterate through all the rows in the file in an easy fashion. Before we start doing that though, in line 17, we create an empty list which we’ll use to store the coordinate pairs we read in from the text file.
We know, in this case, we're just going to create one geometry. It's going to be one polygon created from one list of coordinates. So, it's OK to create that list before we start looping. And we, actually, don't want to create it inside the loop because we would be creating multiple lists, and we just need one of them in this case.
In line 20, we actually start looping through the rows in the file. Each row is going to be represented here by a variable called coords. Inside the loop, we’re going to get the X coordinate and the Y coordinate and append them to the list as a tuple. It’s very important that the first value in this tuple be the X and the second value the Y.
Now, I think a lot of us typically say “latitude/longitude” when talking about coordinates, with the word latitude coming first. It’s important to remember that latitude is the Y value and longitude is the X. So in defining this tuple, we want to make sure we’re supplying the longitude first, then the latitude.
Looking at our text file, we see that the first column is the longitude and the second column is the latitude. (We know that because latitudes don’t go over 90.) So the coordinates are in the correct X/Y order, we just need to keep them that way.
Back to our script, as we iterate through the CSV Reader object, remember that on each iteration, the Reader object simply gives us a list of the values from the current line of the file, which we’re storing in the coords variable. So if we want the longitude value, that’ll be the item from the list at position 0. If we want the latitude, that’ll be the item at position 1. So, we use coords[0] to get the longitude and coords[1] to get the latitude.
Now, going back to our file, you'll see that in the first column or column 0, that's the longitude. So, we have coords[0] in our code. And then, the next piece is the latitude. So, we use coords[1] for that.
So we’re only doing one thing in this loop: appending a new X/Y coordinate pair to the list on each iteration.
Now, line 25 is the first statement after the loop. We know that because that line of code is not indented. At this point, we’ve got the coordinates of the mystery state in a list, so we’re ready to add a polygon to the shapefile. To add new features to a feature class, we need to use an InsertCursor. And that’s what we’re doing there on line 25: opening up a new insert cursor.
That cursor needs a couple of parameters in order to get started. It needs the feature class that we're going to modify, which is referenced by the variable shapefile. Remember, we created that back in line 8.
And then, the second parameter we need to supply a tuple of fields that we're going to modify. In our case, we're only going to modify the geometry. We're not going to modify any attributes, so the way that we supply this tuple is it just has one item, or token, SHAPE with the @ sign.
And then, our final line 26 actually inserts the row. And it inserts just the list of points we populated in our loop. Because the shapefile was created to hold polygons, a polygon geometry will be created from our list of points. When this is done, we should be able to go into ArcGIS Pro and verify that we indeed have a polygon inside of that shapefile.
One little quirky thing to note about this code is in the last line, where I supplied the tuple of values corresponding to the tuple of fields that was associated with the cursor. When you’re supplying just a single value as we were here, it’s necessary to follow that value up with a comma. If my cursor was defined with more than one field, say 2 fields, then my values tuple would not need to end in a comma like this. It’s only when specifying just a single value that the values tuple needs this trailing comma.
This is a good place to remind you that you’re not limited to setting the value of a single field. For example, if there were a Name field in this shapefile, and we happened to know the name of the state we were adding, we could add Name to the fields tuple and then when doing insertRow() we could supply the name of the state we’re adding in addition to the point list.
Now, the script we just walked through uses the approach to geometry creation that’s recommended to use whenever possible because it offers the best performance. That approach works when you’re dealing with simple, single-part features and the coordinates are in the same spatial reference as the feature class you’re putting the geometry into. And when you’re working with ArcGIS Desktop 10.6 or later or ArcGIS Pro 2.1 or later because that’s when support for this approach was added.
So for example, this approach would *not* work for adding the state of Hawaii as a single feature since that would require inserting a multi-part polygon. It also wouldn’t work if our empty shapefile was in, say, the State Plane Coordinate System rather than WGS84 geographic coordinates.
In those cases, you’d have no choice but to use this alternate solution that I'm going to talk through now.
In this version of the script, note that in line 10, we get the spatial reference of the MysteryState shapefile using the Describe method. We’ll go on to use this SpatialReference object later in the script when we create the Polygon object. We didn’t bother to get the spatial reference of the shapefile in the other version of the script because that method of creating geometries doesn’t support supplying a spatial reference.
The next difference in this second script comes on line 18. Instead of creating a new empty Python list, we create an arcpy Array object.
Then inside the loop, instead of putting the coordinates into a tuple and appending the tuple to the list, we create an arcpy Point object, again in X/Y order. Then, we use the Array’s add() method to add the Point object to the Array.
After the loop is complete and we’ve populated the Array, we’re ready to create an object of the Polygon class. The Polygon constructor requires that we specify an Array of Points, which is in our polygonArray variable. Optionally, we can supply a SpatialReference object, which we’re doing here with our spatialRef variable.
Supplying that spatial reference doesn’t really have any effect in this instance because our coordinates and feature class are in the same spatial reference, but you could see the difference between these two if you created an empty feature class that was defined to use a different spatial reference, say one of the State Plane coordinate systems for New Mexico. Running this version of the script would result in the data being properly aligned because we’re telling arcpy how our data is projected, so it can re-project it behind the scenes into the State Plane coordinates. With the other version of the script, the data can't be properly aligned because that version doesn’t specify a coordinate system.
In any case, this version of the script finishes up by passing the Polygon object to the insertRow() method rather than a list of coordinate pairs.
So, those are two ways you can solve this exercise.
Lesson 4 Practice Exercise B
This practice exercise does not do any geoprocessing or GIS, but it will help you get some experience working with functions and dictionaries. The latter will be especially helpful as you work on Project 4.
The objective
You've been given a text file of (completely fabricated) soccer scores from some of the most popular teams in Buenos Aires. Write a script that reads through the scores and prints each team name, followed by the maximum number of goals that team scored in a game, for example:
River: 5
Racing: 4
etc.
Keep in mind that the maximum number of goals scored might have come during a loss.
You are encouraged to use dictionaries to complete this exercise. This is probably the most efficient way to solve the problem. You'll also be able to write at least one function that will cut down on repeated code.
I have purposefully kept this text file short to make things simple to debug. This is an excellent exercise in using the debugger, especially to watch your dictionary as you step through each line of code.
This file is space-delimited, therefore, you must explicitly set up the CSV reader to use a space as the delimiter instead of the default comma. The syntax is as follows:
csvReader = csv.reader(scoresFile, delimiter=" ")
Tips
If you want a challenge, go ahead and start coding. Otherwise, here are some tips that can help you get started:
- Create variables for all your items of interest, including winner, winnerGoals, loser, and loserGoals and assign them appropriate values based on what you parsed out of the line of text. Because there are often ties in soccer, the term "winner" in this context means the first score given and the term "loser" means the second score given.
- Review section 4.17 on dictionaries in the Zandbergen text. You want to make a dictionary that has a key for each team, and an associated value that represents the team's maximum number of goals. If you looked at the dictionary in the debugger it would look like {'River': '5', 'Racing': '4', etc.}
- You can write a function that takes in three things: the key (team name), the number of goals, and the dictionary name. This function should then check if the key has an entry in the dictionary. If not, a key should be added and its value set to the current number of goals. If a key is found, you should perform a check to see if the current number of goals is higher than the value associated with that key. If so, you should set a new value. Notice how many "ifs" appear in the preceding sentences.
Lesson 4 Practice Exercise B Solution
This practice exercise is a little trickier than previous exercises. If you were not able to code a solution, study the following solution carefully and make sure you know the purpose of each line of code.
The code below refers to the "winner" and "loser" of each game. This really refers to the first score given and the second score given, in the case of a tie.
# Reads through a text file of soccer (football)
#  scores and reports the highest number of goals
#  in one game for each team

# ***** DEFINE FUNCTIONS *****

# This function checks if the number of goals scored
#  is higher than the team's previous max.
def checkGoals(team, goals, dictionary):
    #Check if the team has a key in the dictionary
    if team in dictionary:
        # If a key was found, check goals against team's current max
        if goals > dictionary[team]:
            dictionary[team] = goals
        else:
            pass
    # If no key found, add one with current number of goals
    else:
        dictionary[team] = goals

# ***** BEGIN SCRIPT BODY *****

import csv

# Open the text file of scores
scoresFilePath = "C:\\Users\\jed124\\Documents\\geog485\\Lesson4\\Lesson4PracticeExercises\\Lesson4PracticeExerciseB\\Scores.txt"
with open(scoresFilePath) as scoresFile:
    # Read the header line and get the important field indices
    csvReader = csv.reader(scoresFile, delimiter=" ")
    header = next(csvReader)

    winnerIndex = header.index("Winner")
    winnerGoalsIndex = header.index("WG")
    loserIndex = header.index("Loser")
    loserGoalsIndex = header.index("LG")

    # Create an empty dictionary. Each key will be a team name.
    #  Each value will be the maximum number of goals for that team.
    maxGoalsDictionary = {}

    for row in csvReader:

        # Create variables for all items of interest in the line of text
        winner = row[winnerIndex]
        winnerGoals = int(row[winnerGoalsIndex])
        loser = row[loserIndex]
        loserGoals = int(row[loserGoalsIndex])

        # Check the winning number of goals against the team's max
        checkGoals(winner, winnerGoals, maxGoalsDictionary)

        # Also check the losing number of goals against the team's max
        checkGoals(loser, loserGoals, maxGoalsDictionary)

    # Print the results
    for key in maxGoalsDictionary:
        print (key + ": " + str(maxGoalsDictionary[key]))
Below is a video offering some line-by-line commentary on the structure of this solution.
Video: Solution to Lesson 4 Practice Exercise B (13:03)
This video describes one possible solution for Lesson 4 practice exercise B where you are reading the names of soccer teams in Buenos Aires, looking at their scores, and then compiling a report about the top number of goals scored by each team over the course of the games covered by the file.
In order to maintain all this information, it's helpful to use a dictionary, which is a way of storing information in the computer's memory based on key-value pairs. So, the key in this case will be the name of the team, and the value will be the maximum number of goals found for that team as we read the file line by line. Now, this file is sort of like a comma separated value file, though the delimiter in this case is a space. The file does have a header, which we'll use to pull out information.
The header is organized in terms of winner, winner goals, loser, and loser goals. Although, really, there are some ties in here. So, we might say first score and second score rather than winner and loser. For our purposes, it doesn't matter who won or lost because the maximum number of goals might have come during a loss or a tie.
So, this solution is a little more complex than some of the other practice exercises. It involves a function which you can see beginning in line 9, but I'm not going to describe the function just yet. I'll wait until we get to the point where we need the logic that's in that function. So, I'll start explaining this solution by going to line 23, where we import the Python CSV module.
Now, there's nothing in this script that uses ArcGIS or arcpy geometries or anything like that, so I don't import arcpy at all. But you will do that in Project 4, where you'll use a combination of the techniques used here along with ArcGIS geometries and really put everything together from both the practice exercises. In line 26, we set up a variable representing the path to the scores text file. And in line 27, we actually open the file. By default, I'm opening it here in read mode. The opening mode parameter is not specifically supplied here.
In line 29, we create the CSV reader object. You should be familiar with this from the other examples in the lesson and the other practice exercise. One thing that's different here is, as a second parameter, we can specify the delimiter using this type of syntax-- delimiter equals, and then the space character.
Again, this file does have a header. So in line 30, we'll read the header, and then we figure out the index positions of all of the columns in the file. That's what's going on in lines 32 through 35.
Now, we know that these columns are in a particular order. But writing it in this way where we use the header.index method makes the script a little more flexible in case the column order had been shifted around by somebody, which could easily happen if somebody had previously opened this file in a spreadsheet program and moved things around.
In line 39, we're going to create a blank dictionary to keep track of each team and the maximum number of goals they've scored. We'll refer to that dictionary frequently as we read through the file.
In line 41, we begin a loop that actually starts reading data in the file below the header. And so, lines 44 through 47 are pulling out those four pieces of information-- basically, the two team names and the number of goals that each scored. Note that the int() function is used to convert the number of goals in string format to integers. Now, when we get a team name and a number of goals, we need to check it against our dictionary to see if the number of goals scored is greater than that team's maximum that we’ve encountered so far. And we need to do this check for both the winner and the loser-- or in other words, the first team and the second team listed in the row.
To avoid repeating code, this is a good case for a function. Because we're going to use the same logic for both pieces so why not write the code just once in a function? So, in lines 50 and 53, you'll see that I'm invoking a function called checkGoals. And I pass in three things. I pass in the team name, I pass in the number of goals, and the dictionary.
This function is defined up here in line 9. Line 9 defines a function called checkGoals, and I create variables here for those three things that the function needs to do its job -- the team, the number of goals, and the dictionary. Line 11 performs a check to see if the team already has a key in the dictionary. If it does, then we need to look at the number of goals that have been stored for the team and check it against the score that was passed into the function to see if that maximum number of goals needs to be updated.
So in line 13, that check is occurring. And if indeed the number of goals passed into the function is greater than the maximum that we’ve run into so far, then in line 14, we update the team’s entry in the dictionary, setting it equal to what was passed into the goals variable. If the number of goals passed into the function is not greater than our maximum, then we don't want to do anything. So that's what's in line 16 where it says pass. The pass is just a keyword that means don't do anything here. And really, we could eliminate the else clause altogether if we wanted to.
Now, if the team has never been read before, and it doesn't have an entry in the dictionary, then we're going to jump down to line 18. We're going to add the team to the dictionary, and we're going to set its max goals to the number passed into the goals variable. No need to check against another number, since there’s nothing in the dictionary yet for that team.
Now, what we can do to get a better feel for how this script works is to run it with the debugging tools. So I’ve inserted a breakpoint on the first line inside the checkGoals function, and I'm going to run the script up until the first time this function gets called. And I can click on the Variables window here to follow along with what’s happening to my variables.
I can see that there are global and local variables. The local variables are the ones defined within the checkGoals function since that's where the script execution is currently paused. If I look at the globals list, I can find the row variable, which holds the list of values from the first line of the file. The variables I want to focus on though are the ones defined as part of the function, the locals -- the dictionary, goals, and team variables.
So on this first call to the function we've passed in Boca as the team and 2 as the number of goals. And right now, there's nothing in our dictionary. So when evaluating line 11, we’d expect PyScripter to jump down to line 19 because the team does not have a key in the dictionary yet. So I'll see what happens by clicking on the Step button here. And we see that we do in fact jump down to line 19. And if I step again, I will be adding that team to the dictionary. I can check on that; note that it's jumped out of the function because that was the last line of the function. It's jumped back to the main body of the script, which is another call to the checkGoals function, this time for the losing team. While we're paused here, if I scroll down in the list of locals I can find the maxGoalsDictionary and I can see that it now has an entry for Boca with a value of 2.
If I hit Resume again, it will run to the breakpoint again. So now it's dealing with data for the losing team from that first match -- Independiente with 1 goal. Again, because Independiente doesn't have a key in the dictionary, we would expect the script to jump down to line 19, and indeed that is what happens. So when I hit Step again, it's going to add an entry to the dictionary for that second team.
I’m going to hit the Resume button a couple more times for that second game, adding two more teams to the dictionary. Now I’m going to pause as we’ve hit a line where we have teams that we have encountered before. On this current call to the function, the team is River, and they scored 2 goals in this particular match. Looking at the dictionary, we can see that River's current maximum is 0. So, in this case we would expect on line 11 to find that yes, the team is already in the dictionary and so we'd expect it to jump down to line 13 instead of line 19. And that's what happens. So now we're going to check -- Is the value in the goals variable greater than their current maximum, which is 0. And indeed it is, so we’ll execute line 14, updating the dictionary with a new maximum goals for that team.
And we could continue stepping through the script, but hopefully, you get the feel for how the logic plays out now.
So as you're working on Project 4, and you're working with dictionaries in this manner, it's a good idea to keep the debugger open and watch what's happening, and you should be able to tell if your dictionary is being updated in the way that you expect.
So to finish out this script, once we have our dictionary all built, after this for loop is finished, then we're going to loop through the dictionary and print each key and each value. And that can be done using a simple for loop, like in line 56. In this case, the variable key represents a key in the dictionary. And in line 57, we print out that key, we print a colon and a space, and then we print the associated value with that key. If you want to pull a value out of a dictionary, you use square brackets, and you pass in the key name. And so, that's what we're doing there. So running this all the way through should produce a printout in the Python Interpreter of the different teams, as well as the maximum number of goals found for each.
Project 4: Reconstructing a car's path
In this project, you're working as a geospatial consultant to a company that offers auto racing experiences to the public at Wakefield Park Raceway near Goulburn, New South Wales, Australia. The company's cars are equipped with a GPS device that records lots of interesting data on the car's movements and they'd like to make their customers' ride data, including a map, available through a web app. The GPS units export the track data in CSV format.
Your task is to write a script that will turn the readings in the CSV file [21] into a vector dataset that you can place on a map. This will be a polyline dataset showing the path the car followed over the time the data was collected. You are required to use the Python csv module to parse the text and arcpy geometries to write the polylines.
The data for this project were made possible by faculty member and Aussie native James O'Brien, who likes to visit Wakefield Park to indulge his love of racing.
Please carefully read all the following instructions before beginning the project. You are not required to use functions in this project but you can gain over & above points by breaking out repetitive code into functions.
Deliverables
This project has the following deliverables:
- Your plan of attack for this programming problem, written in pseudocode in any text editor but as a separate document. This should consist only of short, focused steps describing what you are going to do to solve the problem. This is a separate deliverable from your customary project writeup and the well-documented script.
- A Python script that reads the data from the file and creates, from scratch, a polyline shapefile with n polylines, n being the number of laps recorded in the file. Each polyline should represent a single lap around the circuit. Each polyline should also have a Short field that stores the corresponding lap number from the CSV file. The shapefile should use the WGS 1984 geographic coordinate system.
- A short writeup (~300 words) explaining what you learned during this project and which requirements you met, or failed to meet. Also describe any "over and above" efforts here so that the graders can look for them.
Successful delivery of the above requirements is sufficient to earn 90% on the project. The remaining 10% is reserved for efforts that go "over and above" the minimum requirements. This could include (but is not limited to) a batch file that could be used to automate the script, creation of the feature class in a file geodatabase instead of a shapefile, or the breaking out of repetitive code into functions and/or modules. Other over and above opportunities are described below.
Challenges
You may already see some immediate challenges in this task:
- You have not previously created a feature class programmatically. You must find and run ArcGIS geoprocessing tools that will create an empty polyline shapefile with a Short Integer field for storing the lap number. You must also assign the WGS 1984 geographic coordinate system as the spatial reference for this shapefile.
- Almost all of the lines in the file contain a set of 13 values, corresponding to the column names found in the header. However, at the end of each lap you will find a line that records the time required to complete the lap. For example:
# Lap 1: 00:01:24.259
Your script will need to skip over these lap time lines without choking. Similarly, the file ends with a line -- # Session End -- that should not break the script.
Hints
- Before you start writing code, write a plan of attack describing the logic your script will use to accomplish this task. Break up the original task into small, focused chunks. You can write this in Word or even Notepad. Your objective is not to write fancy prose, but rather short, terse statements of what your code will do: in other words, pseudocode.
- You will have a much easier time with this assignment if you approach it incrementally. Start by opening the CSV file, reading through the lines, properly handling the various types of lines, and printing the values of interest to the Console. If you can get that to work, see if you can create a single polyline from the full set of points, ignoring the laps. If you can get that to work, try to tackle the requirement of creating a separate polyline for each lap, etc.
- A Python dictionary is an excellent structure for storing a lap number coupled with the lap's list of points. A dictionary is similar to a list, but it stores items in key-value pairs. In this scenario, we recommend using the lap numbers as the dictionary keys and lists of the points associated with the laps as the values associated with the keys. You can retrieve any value based on its key, and you can also check whether a key exists using a simple if key in dictionary: check.
- To create your shapefile programmatically, use the Create Feature Class tool. The ArcGIS Pro Help has several examples of how to use this tool. Note that the feature class's schema (i.e., its fields) isn't specified as part of the Create Feature Class tool. You'll need to use a different tool, which can be found through a documentation search or a web search, to add the Lap field. If you can't figure out the setup of the new feature class programmatically, I suggest you create it manually and work on writing the rest of the script. You can then return to this part at the end, if you have time.
- In order to get the shapefile in WGS 1984, you'll need to create a spatial reference object that you can assign to the shapefile at the time you create it. I recommend using the arcpy.SpatialReference() method. Be warned that if you do not correctly apply the spatial reference, your polyline precision could be diluted.
- Remember that polylines can be produced from either an arcpy Array of Point objects or a list of x, y coordinate pairs.
- If you do things right, your polylines should look like this (the line feature class has been added and symbolized manually showing each lap in a different color):

Over and above opportunities
There are numerous opportunities for meeting the project's over and above requirement. Here is a "package" of ideas that you might consider implementing together to do a better job of meeting the original scenario requirements:
- Omit the first and last laps from the data you insert into the new shapefile. The driver is pulling out of and back into the pits during these laps and is not interested in the times associated with them.
- Record the time needed to drive each lap. There are a couple of ways to approach this problem: a) working with the lap time strings found after the last point in each lap, parse the string into its constituent parts using string manipulation functions and convert to just seconds, or b) compute the difference between each lap's last point and first point Time values. (The value to record for the lap noted above would be 84.259, in a Float field.)
- The car position is recorded many times per second, resulting in thousands of "breadcrumbs" in the export file. The company would like to avoid using all of the position data so as to minimize their disk usage with the cloud provider they're using for the web app. In developing your script, include every nth point from the input CSV file, where n is defined at the top of the script or through a script tool parameter. The only exception to this rule is that they'd also like you to include the first and last point of every lap.
- Run your script with a Pro tool and programmatically add the new feature class to the current Pro project with a symbology like shown in the figure above.
Moving beyond these ideas, there is a lot of potentially interesting information hidden in the time values associated with the points (which gets lost when constructing lines from the points). One fairly easy step toward analyzing the original data is to create a script tool that includes not only the option to create the polyline feature class described above, but also a point feature class (including the time, lap, speed, and heading values for each point). Or if you want a really big challenge, you could divide the track into segments and analyze the path data to find the lap in which the fastest time was recorded within each segment.