EME 210
Data Analytics for Energy Systems

Importing Files: Option 1

PrintPrint

Importing Files: Option 1

 Read It: Importing Files

Introducing Comma Separated Value files

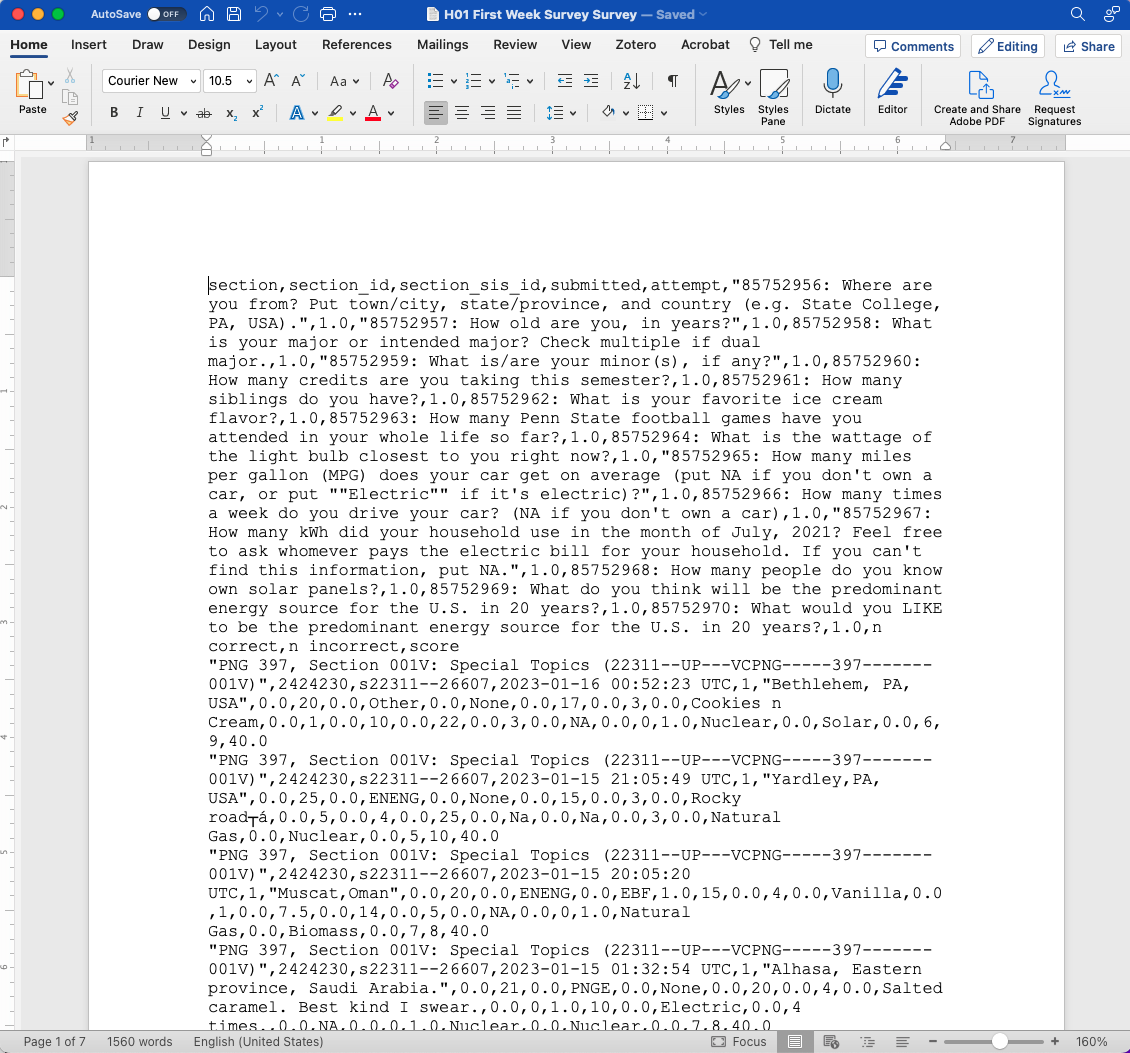
In this course, you will primarily work with CSV (comma-separated value) files. You can recognize these files in your computer file system as xxxxxxx.csv files, with the “.csv” extension. These files can be easily opened with spreadsheet software, such as Microsoft Excel or Google Sheets. Technically, they can even be opened by Microsoft Word or basic text editors. However, they may not look like a table in those formats! Below we have some examples of what a CSV file looks like in Excel, Word, and a generic text editor.

screenshot as described in preceding text
CSV file in Excel
Credit: © Penn State is licensed under CC BY-NC-SA 4.0 
screenshot as described in preceding text
CSV file in Word
Credit: © Penn State is licensed under CC BY-NC-SA 4.0 
screenshot as described in preceding text
CSV file in TextEditor
Credit: © Penn State is licensed under CC BY-NC-SA 4.0 

CSV files are also easy to read into nearly every programming language. This means that if you're working in Python, you can read in a CSV file, make some changes, write to a new CSV file, and send the new file to a colleague working in R or MATLAB. If it is in CSV format, they will be able to open the same file and see what you did without any issues going between the languages.

How to read files into Google Colab

When you are using Python, you can read other file types beyond CSV files. For example, Python can read an Excel spreadsheet (“.xls” or “.xlsx” extensions) or a text file (“.txt” extension). If you get into more advanced coding, you can read in GIS files or Google Maps files. In Python, you can read nearly any file type that you come across, but in this class, we'll be using CSV files.

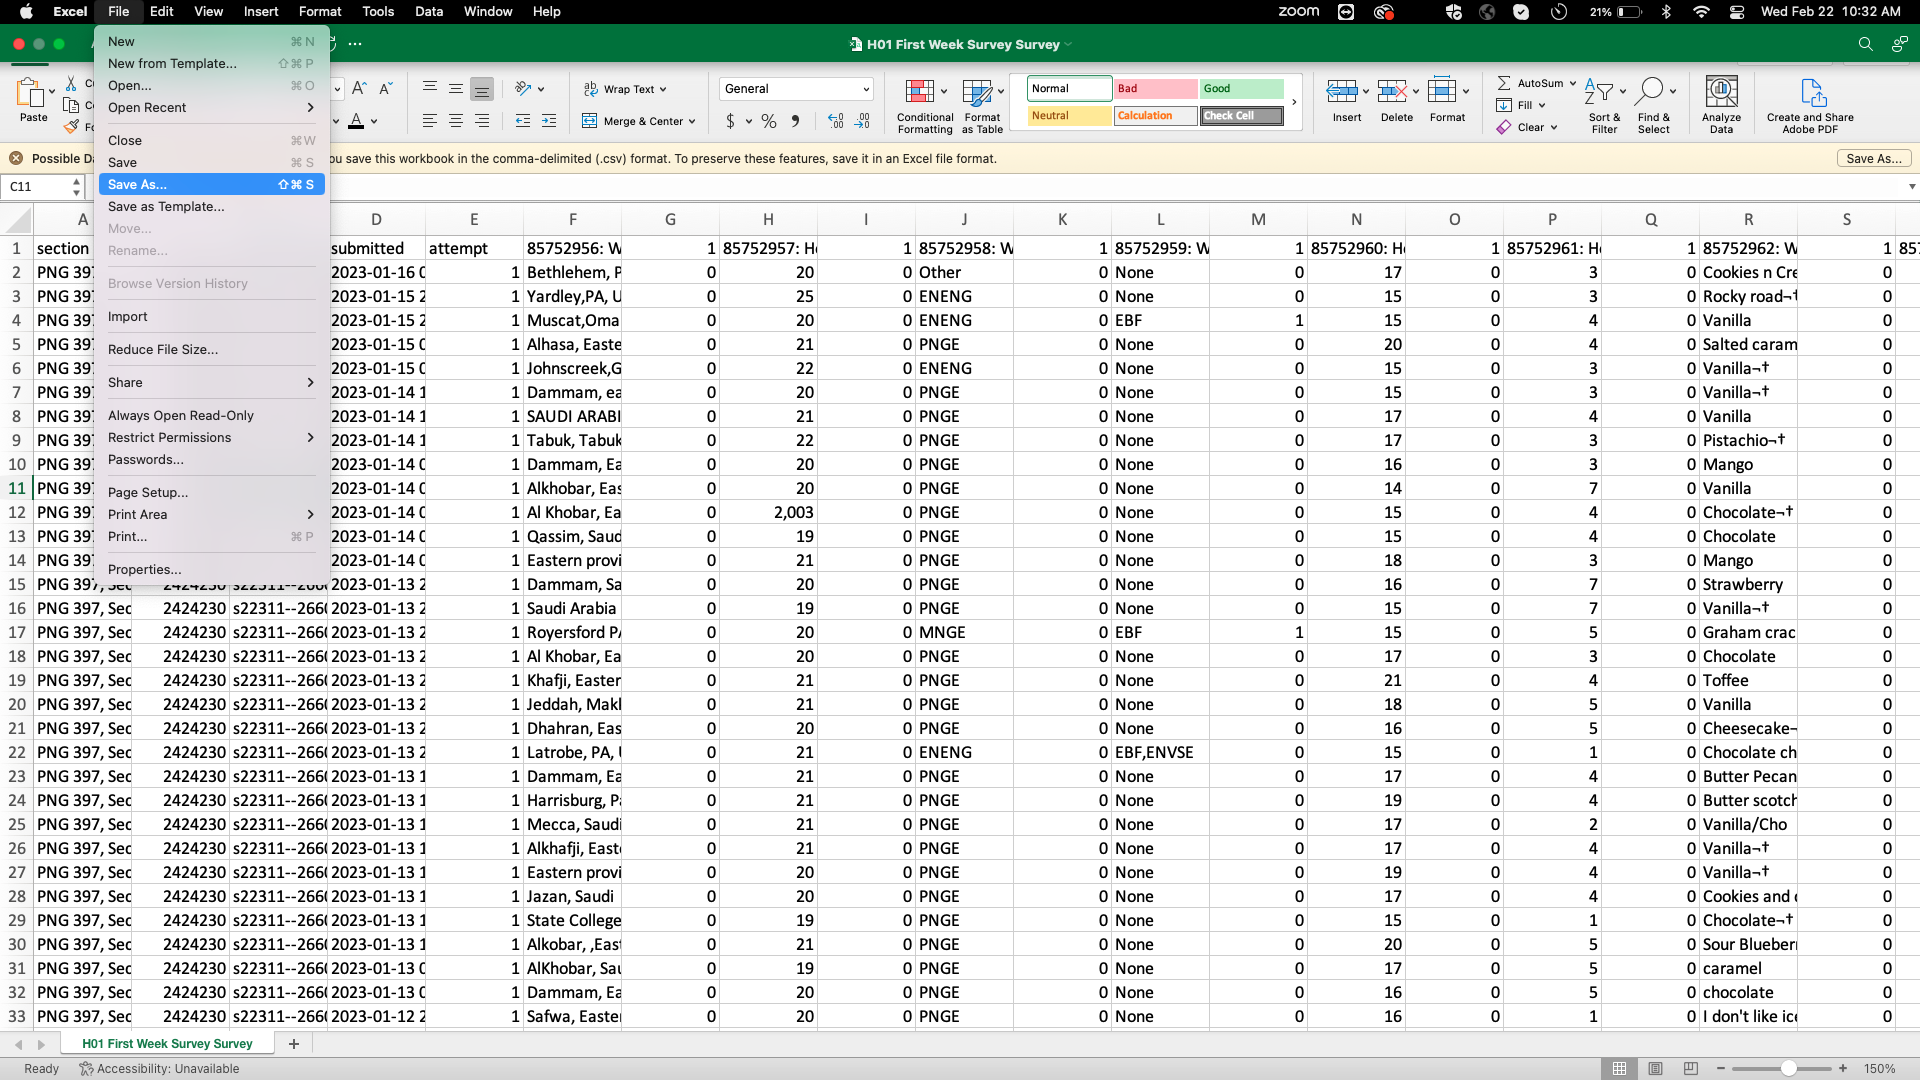
Occasionally, you may come across data that is in Excel format (“.xlsx” extension), but want to read it into Python as a CSV file. In this case, you can easily convert your file using the “Save As...” feature, shown below.

Web page depicting step1 for "saving image as" CSV file by selecting from drop down menu.
Save as a CSV - Step 1
Credit: © Penn State is licensed under CC BY-NC-SA 4.0 
Web page depicting step2 for "saving image as" CSV file by selecting selecting format from drop down menu.
Save as a CSV - Step 2
Credit: © Penn State is licensed under CC BY-NC-SA 4.0 

Once you have your data in CSV format, you need to upload that data to Colab. To do this, we will be using the Pandas library, which was introduced previously in this lesson. In this lesson, we will be demonstrating three main ways to import CSV files into Colab, the first of which uses your existing Google Drive. Note that in order to use this method of uploading files, you will need to have your CSV file of interest stored on your Google Drive prior to running the code.

  Watch It: Video - Importing Files: Option1 (5:44 minutes)

Click here for a transcript.

Hello. Today we're going to be talking about how you import data into Google Colab. We're going to talk about three different methods over the course of three videos, each of which is slightly different, but it'll give you good practice on how you can import data and then going forward you can always choose whichever one you feel the most comfortable with. So, without further ado, let's go ahead and get started.

So, over here in Google Colab we have some text cells that describe these different methods. So, the first one I'm going to go over is mounting your Google Drive, the second is what I call the drag and drop, and the third is using a special upload files button. Before we get started, just a reminder of some key terminology. We'll be working with libraries, and we'll be working with functions within those libraries, and we're going to give libraries nicknames. And we do all of this through using the “from” import and “as” commands.

All right, so in order to mount your Google Drive… first in order for this to work you will need to have all of your data stored on your personal Google Drive, but once it's there you can always access it through this process. So, to start we're going to import the drive library from the Google Colab meta library. So, we say from Google Colab, so this is our meta, or larger, library. We're going to import a sub library called Drive, and then in order to connect to our Google Drive, we use that library “drive” with the mount command, and we say, “slash content slash drive,” in quotes. And so, we click this, and it's going to go through a process. So you need to say, “yes.” Connect. Use your Penn State email address. Say, “allow,” and it'll sort of go through its process. And occasionally, it takes longer or shorter, depending on the current resources available. But once it's done, you'll see this check mark. It'll tell you that we mounted it and if you click this file folder over here, we now see that there is a drive folder.

And so, this is where we start step three. We click the file folder icon. We click into the drive folder, and you navigate to wherever you stored your data. So, I'm going to use this lecture for three retail sales. I'm going to click these three dots over here and copy the path, and then I'm going to close that. And that path is where we're going to actually access the data.

Before we can do that though, we need to import another library. So we say import pandas as PD. So, here the library is called pandas, and we're giving it a nickname PD so that when we use these commands, we don't need to repeatedly type pandas over and over again, we can just type PD, makes things a little faster.

And so then to actually read the file in we give it a name. So, I'll just say “DF” for data frame and the command is, “PD dot read underscore CSV.” And then you open some quotes. And here is where you actually paste that file path that you copied earlier using step three. And sometimes this will be where you end. In this particular file we need to add an additional argument. We say skip rows equals four. And we're doing this because this particular data set has four rows of metadata where it's telling us the units, and the source of the data, and their own internal processes they went through. And we don't need that, we want to start with row five, which is where the headers are. And this is something that you generally only learn by opening the actual file up in Excel to figure out how many rows you need to skip. But we can run that. We can see that it's run here. If we open up the variable tab over here, this X and curly bracket, our data frame now shows up as “DF” tells us the type of data, and the shape. We can also come over here, print the data frame by just typing the name and hitting run, and then we can see that we've got different variables, column headers, and different pieces of data within that data frame. So that is the first option that we have in order to upload data into Google Colab.

Credit: © Penn State is licensed under CC BY-NC-SA 4.0

 Try It: Apply Your Coding Skills in Google Colab

  1. The Google Colab file used in the video is linked here.
  2. Go to the Colab file and click “File” then “Save a copy in Drive”, this will create a new Colab file that you can edit in your own Google Drive account.
  3. Once you have it saved in your Drive, try to implement the following code to import a file of your choice by mounting your Google Drive:

Note: You must be logged into your PSU Google Workspace in order to access the file.

from google.colab import drive

drive.mount('/content/drive')

import pandas as pd

df = pd.read_csv('yourfilename.csv')

df # print the dataframe

Once you have implemented this code on your own, come back to this page to test your knowledge.


 Assess It: Check Your Knowledge

Knowledge Check