The GUI building tool for QT that we are going to use in this lesson is called QT Designer. QT Designer is included in the PyQT5 Python package and can be installed through ArcGIS Pro Python Package manager. The tool itself is platform and programming language independent. Instead of producing code from a particular programming language, it creates a .ui file with an xml description of the QT-based GUI. This .ui file can then be translated into Python code with the pyuic5 GUI compiler tool that also comes with PyQT5. There is also support for directly reading the .ui file from Python code in PyQT5 and then generating the GUI from its content, but we here demonstrate the approach of creating the Python code with pyui5 because it is faster and allows us to see and inspect the Python code for our application. In the following, we will take a quick look at how the QT Designer works.
You can install PyQt5 from the ArcGIS Pro package manager. The QT Designer executable will be in your ArcGIS Pro Python environment folder, either under "C:\Users\<username>\AppData\Local\ESRI\conda\envs\arcgispro-py3-clone\Library\bin\designer.exe" or under “C:\Program Files\ArcGIS\Pro\bin\Python\envs\arcgispro-py3\Library\bin\designer.exe”. It might be good idea to create a shortcut to this .exe file on your desktop for the duration of the course, allowing you to directly start the application. After starting, QT Designer will greet you as shown in the figure below:
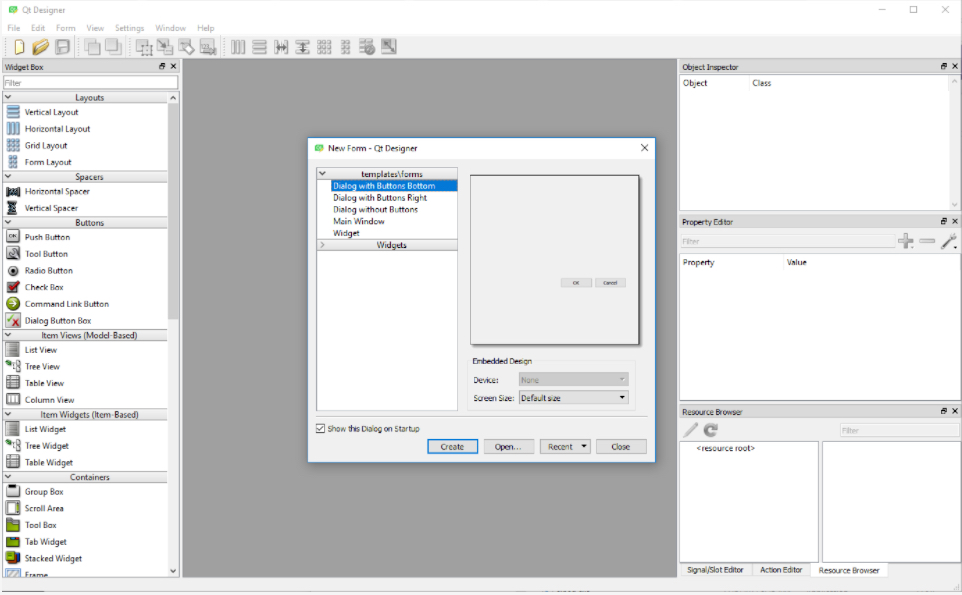
QT Designer allows for creating so-called “forms” which can be the GUI for a dialog box, a main window, or just a simple QWidget. Each form is saved as a single .ui file. To create a new form, you pick one of the templates listed in the “New Form” dialog. Go ahead and double-click the “Main Window” template. As a result, you will now see an empty main window form in the central area of the QT Designer window.
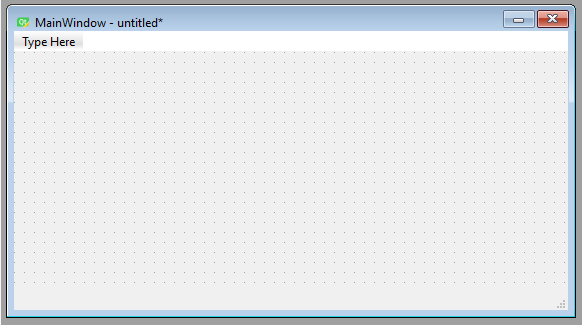
Let’s quickly go through the main windows of QT Designer. On the left side, you see the “Widget Box” pane that lists all the widgets available including layout widgets and spacers. Adding a widget to the current form can be done by simply dragging the widget from the pane and dropping it somewhere on the form. Go ahead and place a few different widgets like push buttons, labels, and line edits somewhere on the main window form. When you do a right-click in an empty part of the central area of the main window form, you can pick “Lay out” in the context menu that pops up to set the layout that should be used to arrange the child widgets. Do this and pick “Lay out horizontally” which should result in all the widgets you added being arranged in a single row. See what happens if you instead change to a grid or vertical layout. You can change the layout of any widget that contains other widgets in this way.
On the right side of QT Designer, there are three different panes. The one at the top called “Object Inspector” shows you the hierarchy of all the widgets of the current form. This currently should show you that you have a QMainWindow widget with a QWidget for its central area, which in turn has several child widgets, namely the widgets you added to it. You can pretty much perform the same set of operations that are available when interacting with a widget in the form (like changing its layout) with the corresponding entry in the “Object Inspector” hierarchy. You can also drag and drop widgets onto entries in the hierarchy to add new child widgets to these entries, which can sometimes be easier than dropping them on widgets in the form, e.g., when the parent widget is rather small.
The “Object” column lists the object name for each widget in the hierarchy. This name is important because when turning a GUI form into Python code, the object name will become the name of the variable containing that widget. So if you need to access the widget from your main code, you need to know that name and it’s a good idea to give these widgets intuitive names. To change the object name to something that is easier to recognize and remember, you can double-click the name to edit it, or you can use “Change objectName” from the context menu when you right-click on the entry in the hierarchy or the widget itself.
Below the “Object Inspector” window is the “Property Editor”. This shows you all the properties of the currently selected widget and allows you to change them. The yellow area lists properties that all widgets have, while the green and blue areas below it (you may have to scroll down to see these) list special properties of that widget class. For instance, if you select a push button you added to your main window form, you will find a property called “text” in the green area. This property specifies the text that will be displayed on the button. Click on the “Value” column for that property, enter “Push me”, and see how the text displayed on the button in the main window form changes accordingly. Some properties can also be changed by double-clicking the widget in the form. For instance, you can also change the text property of a push button or label by double-clicking it.
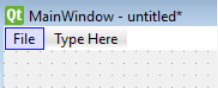
If you double-click where it says “Type Here” at the top, you can add a menu to the menu bar of the main window. Give this a try and call the menu “File”.
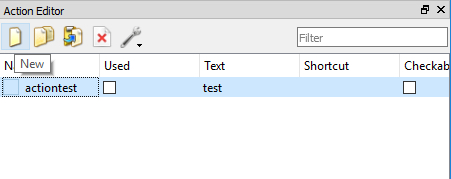
The last pane on the right side has three tabs below it. “Resource browser” allows for managing additional resources, like files containing icons to be used as part of the GUI. “Action editor” allows for creating actions for your GUI. Remember that actions are for things that can be initiated via different GUI elements. If you click the “New” button at the top, a dialog for creating a new action opens up. You can just type in “test” for the “Text” property and then press “OK”. The new action will now appear as actionTest in the list of actions. You can drag it and drop it on the File menu you created to make this action an entry in that menu.
Finally, the “Signal/Slot Editor” tab allows for connecting signals of the widgets and actions created to slots of other widgets. We will mainly connect signals with event handler functions in our own Python code rather than in QT Designer, but if some widgets’ signals should be directly connected to slots of other widgets this can already be done here.
You now know the main components of QT Designer and a bit about how to place and arrange widgets in a form. We cannot teach QT Designer in detail here but we will show you an example of creating a larger GUI in QT Designer as part of the following first walkthrough of this lesson. If you want to learn more, there exist quite a few videos explaining different aspects of how to use QT Designer on the web. For now, here is a short video (12:21min) that we recommend checking out to see a few more basic examples of the interactions we briefly described above before moving on to the walkthrough.
Video: Qt Designer - PyQt with Python GUI Programming tutorial by sentdex
Once you have created the form(s) for the GUI of your program and saved them as .ui file(s), you can translate them into Python code with the help of the pyuic5 tool, e.g. by running a command like the following from the command line using the tool directly with Python :
"C:\Users\<username>\AppData\Local\ESRI\conda\envs\arcgispro-py3-clone\python.exe" –m PyQt5.uic.pyuic mainwindow.ui –o mainwindow.py
or
"C:\Program Files\ArcGIS\Pro\bin\Python\envs\arcgispro-py3\python.exe" –m PyQt5.uic.pyuic mainwindow.ui –o mainwindow.py
depending on where your default Python environment is located (don't forget to replace <username> with your actual user name in the first version and if you get an error with this command try typing it in, not copying/pasting). mainwindow.ui, here, is the name of the file produced with QT Designer, and what follows the -o is the name of the output file that should be produced with the Python version of the GUI. If you want, you can do this for your own .ui file now and have a quick look at the produced .py file and see whether or not you understand some of the things happening in it. We will demonstrate how to use the produced .py file to create the GUI from your Python code as part of the walkthrough in the next section.
Lesson content developed by Jan Wallgrun and James O’Brien